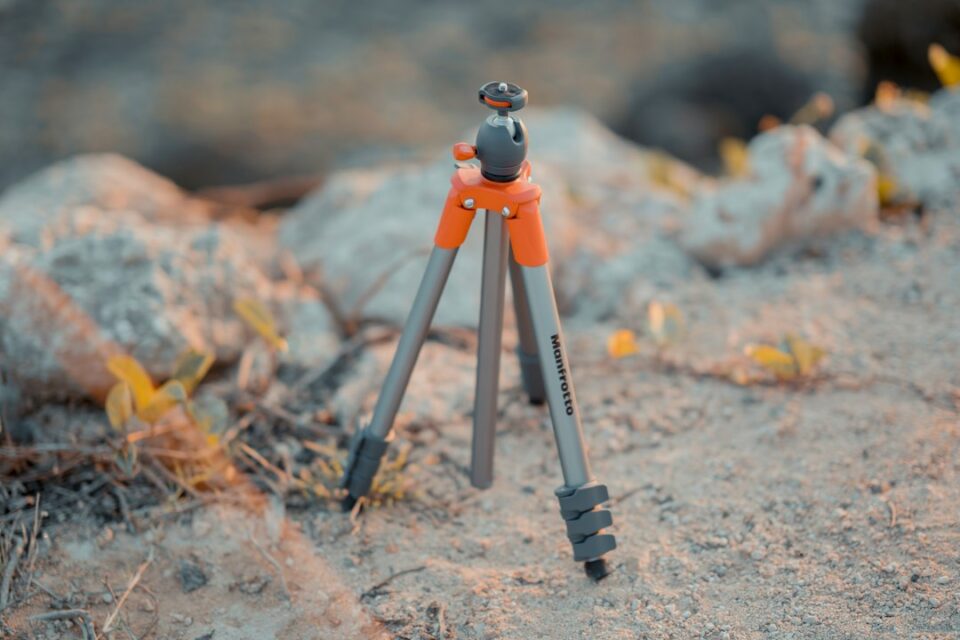
If you’re hunting for the best travel tripod, you’ll quickly discover that no single model wins every scenario. What matters most is matching your camera setup, itinerary, and tolerance for weight with a tripod’s height, stiffness, head type, and packability. This guide translates marketing into plain English, shows repeatable tests you can try at home, compares common materials and locks, covers packing strategies for flights and hikes, and closes with a buyer checklist you can use in-store or online.
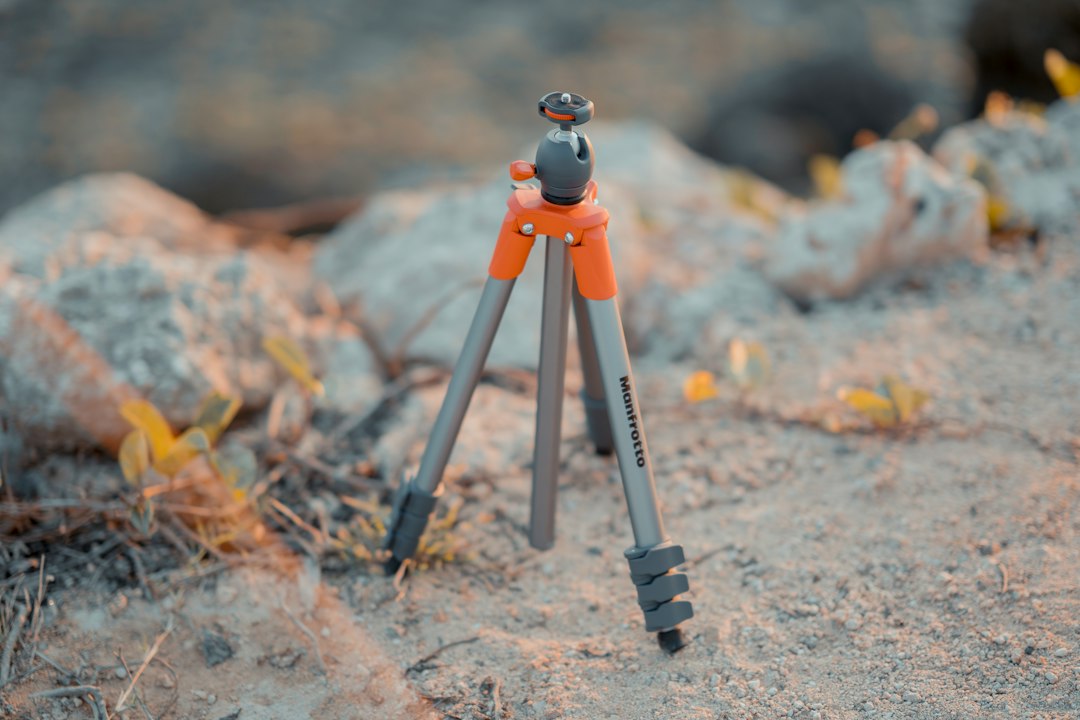
What defines the best travel tripod?
Travel doesn’t simply mean small. The best tripod for travel is a tool that you actually carry and that still keeps your camera steady in the conditions you face most. That balance is usually a triangle of height, stability, and speed of use, with weight and folded length acting as constraints. A city photographer working mostly at 24–50 mm needs quick deployment and compact fold. A dawn landscape shooter on a windy ridge needs stiffness, height without a center column, and leg locks that stay tight in cold hands. A traveler who spends hours on trains and buses needs a tripod that disappears into a bag and comes out without snagging anything.
It helps to articulate non-negotiables before you browse listings. For example, you might write down: “packs inside my 20 L backpack horizontally,” “under 1.3 kg,” “135–145 cm shooting height without center column,” and “Arca-Swiss compatible head.” If a model fails two of these, keep scrolling. If it passes all, you can dig into feel, test stability, and judge the head. The best travel tripod for you is the one that supports your typical shot, is simple enough that you use it often, and inspires trust when wind or long exposures make handholding unrealistic.
The essential numbers decoded
Manufacturers list maximum height, folded length, weight, and load capacity. These four numbers are more nuanced than they look, and understanding them turns a crowded search page into a shortlist within minutes.
- Max height: Eye-level shooting without extending a center column improves stability and comfort. If your eye line is 170–180 cm, a leg set that reaches 130–150 cm without column plus a head (8–10 cm) keeps the camera near your eyes with a slight hunch rather than a crouch. If your landscapes are low and wide, you can accept a lower system. If you often shoot portraits or architecture, you’ll appreciate true height.
- Folded length: Flights reward shorter folded lengths, typically 35–45 cm. That length fits inside most backpacks and horizontally in many carry-ons. If you’re a rail traveler or ride-sharing frequently, the difference between 39 cm and 45 cm is the difference between packing inside versus strapping outside.
- Weight: Under roughly 1.5 kg (3.3 lb) feels reasonable for daylong carry; under 1.2 kg feels easy. Cutting weight often cuts stiffness; models with very thin lower leg sections tend to vibrate longer. There isn’t a free lunch. Try to hold several options and compare their resistance to twist when extended.
- Capacity: Published “load” numbers are marketing shorthand. A tripod that “supports 10 kg” may sag if the head is weak or the column flexes. Think in terms of stiffness and creep. With your heaviest lens, lock the head at 45 degrees and see if it droops after 30 seconds. That test reveals more than a printed capacity.
Two rules of thumb help most travelers. First, avoid raising the center column unless you need it for a horizon or a crowd; columns amplify wobble. Second, prioritize folded length if you care about bringing the tripod every day. The tripod you leave in the room never helps. If you plan to shoot long exposures on wet pavement or windy rooftops, put stiffness ahead of 200 g of savings. Your keeper rate benefits more than your shoulders notice the difference.
Materials: carbon fiber vs aluminum
Carbon fiber and aluminum both work well, and neither is a magic bullet by itself. Carbon tubes tend to deliver better stiffness-to-weight and slightly faster vibration damping for the same tube diameters. Aluminum offers lower cost, high toughness in impact, and easier field repair. The differences matter most at the edges of your use case.
- Weight-to-stiffness: At the same weight, carbon usually feels stiffer because the tubes can be larger or wall thickness optimized. If you hike long distances or climb stairs all day, carbon is often worth the premium. If your tripod spends most of its life near your car or in city hotels, aluminum is pragmatic and durable.
- Temperature feel: Bare aluminum bites in cold weather; carbon feels kinder to hands. Foam wraps help either way and keep fingers off twist locks in winter.
- Damping: Carbon often stops micro-vibrations sooner, which matters at 30-second exposures, macro work, and telephoto shots. But tube size and lock quality matter more than the word “carbon” printed on the leg. An excellent aluminum set can beat a mediocre carbon set in real life.
- Cost and repair: Aluminum costs less and uses parts widely available from multiple brands. Carbon tubes can crack if abused and are more expensive to replace. If you shoot in crowds or shrug off knocks, that’s worth factoring in.
The sweet spot for many travelers is a carbon tripod around 1.2–1.4 kg with four sections and 135–145 cm height without the column. If you’re building a budget kit, an aluminum alternative with similar dimensions gives you 90 percent of the experience at lower cost, with a small penalty in weight and sometimes in damping. Either way, focus on tube diameters, apex strength, and lock quality—the parts that actually control stability.
Locks, sections, and leg geometry
Locks and section counts shape both deployment speed and stiffness. Four design choices have outsized impact: twist versus flip locks, number of leg sections, the column and apex design, and leg angle mechanisms.
- Twist locks: Compact, snag less in bags, and easy to deploy once your hands learn the rhythm. Good designs let you grab and twist multiple collars at once with one hand. Look for positive stop at full extension and smooth action after months of use.
- Flip locks: Lever clamps are easy to see at a glance, often faster for beginners, and glove-friendly. They can snag straps and clothing. Budget flips sometimes need periodic tension adjustment to avoid slipping.
- Three vs four sections: Three-section legs have fewer joints and thicker lower tubes, usually giving better stiffness and faster setup, but they fold longer and won’t fit every bag. Four-section legs fold shorter, travel easier, and pack into more places, with a small penalty in stiffness when fully extended. Five sections exist for ultra-compact models; they trade more stiffness for the shortest pack length.
- Leg angles and locks: Multi-angle detents let you splay legs low for macro, uneven ground, or crowded sidewalks. A good mechanism uses a large, glove-friendly tab, positive detents, and avoids finger pinches when you push the legs back to the default angle.
Beyond locks, check the apex—the top casting that connects legs to the head. A wider, robust apex with a thick 3/8 in socket improves torsional rigidity. Some ultra-compact designs shrink the apex to reduce folded length; that’s fine, but it caps ultimate stiffness. To feel torsional resistance, extend to your normal height, hold the apex, and gently twist a leg with your other hand. Less twist suggests better geometry and manufacturing precision. If you often shoot near traffic or in busy streets, look for legs with minimal rotation inside the tubes; they deploy faster and feel more predictable.
Heads and quick‑release systems
The head is the soul of a tripod. A great leg set with a weak head is frustrating, while a good head can make a modest leg set feel more confident. Travel tripods typically ship with compact ball heads, but you can also consider three-way and compact fluid heads depending on your subjects.
- Ball heads: Fast, compact, and ideal for general use. Seek a separate panning lock, a friction adjustment (drag) for fine control, and a lock that resists creeping under your heaviest lens. Size up one for long exposures in wind. A top-mounted bubble level is handy for architecture and panoramas.
- Three-way pan heads: Precise, with independent axis control for careful alignment. They’re bulkier and slower to pack, so they suit deliberate architecture, product, or copy work rather than fast street photography.
- Compact fluid heads: If you shoot video, a small fluid head with smooth drag and a basic counterbalance range makes pans and tilts more consistent. It’s heavier and longer when packed, so pair it with a leg set that still folds inside your bag.
Plate systems matter. An Arca‑Swiss compatible clamp lets you use L‑brackets, macro rails, and plates from many brands, plus clamps on gimbals and sliders. Proprietary plates limit flexibility. Check safety stops or captive screws to reduce the chance of your camera sliding free when you loosen the clamp. If you plan to shoot verticals often, consider an L‑bracket for your camera so you can keep the center of mass over the apex without angling the ball into the slot.
Stability tests you can repeat at home
You don’t need a lab to compare tripods. These repeatable tests reveal how a tripod behaves with your own gear. Do them in the store with permission, or at home during a return window. They take minutes and answer most stability questions.
- Tap test: Extend legs to your typical height without the column, mount the camera, lock the head, and gently tap the lens barrel. Watch Live View at maximum magnification or use your camera’s focus magnifier. Count the seconds until the image settles. Shorter is better. Repeat with the column raised halfway. If settle time doubles or more, you have your answer about column use.
- Wind proxy: Hang a 0.5–1 kg bag from the apex hook to simulate wind and accidental bumps. Keep the weight as close to the apex as possible—drop the column slightly so the bag sits near the top of the legs. If the legs flex or the head creeps immediately, consider a stiffer leg set or a stronger head.
- Uneven ground: Set up on stairs, a sloped driveway, or a rough yard. Lock different leg angles and see how easy it is to level the head. Some designs make angle changes smooth; others require two hands and patience. The easier it is, the more you’ll use the feature in the field.
- Night trial: Attempt a 15–30 second exposure at 24–50 mm and at 85–100 mm if you have the lens. Zoom in on the rear screen and look for micro-blur or repetitive patterns that indicate wobble. Try again with the column up and down. This test correlates with the hit rate you’ll see in real scenes.
- Head creep: Frame a scene with the head locked and leave it for two minutes. Does the framing drop? If so, you need more head friction, a stronger lock, or a slightly larger head. Some small travel heads sacrifice lock strength to save weight—know that before you buy.
These tests favor consistency over perfection and give you a baseline for future upgrades. When you can repeat a test across models, you build intuition for the small differences that add up to more keepers at dusk and fewer missed frames in wind.
Scenario‑based choices and packing strategies
Good tripods fit their trips. Rather than searching for a mythical universal winner, choose by scenario, then refine by weight and folded size. Here are typical travel cases and the features that matter most for each.
- City weekends: Put folded length and deployment speed first. A four-section carbon or aluminum model around 1.2–1.4 kg with a compact ball head disappears into a 20–25 L daypack and sets up fast on sidewalks. Rubber feet help in museums and polished stone. A small strap keeps it secure to the pack when you don’t want it inside.
- Mountain hikes: Favor stiffness and height without the column. A three-section carbon set around 1.1–1.3 kg that reaches 130–140 cm without the column feels solid in gusts. Add a short column or columnless apex (flat plate) to reduce movement. Spikes or rock claws improve bite on dirt and granite.
- Coastlines and beaches: Sand and salt attack locks and threads. Twist locks with seals help; more important is easy disassembly for rinsing. Rinse with fresh water after the session, extend and collapse several times, and let it dry thoroughly before storage. Consider dedicated rubber feet for boardwalks and spikes for wet sand.
- Macro and low‑angle: Wide angle detents, reversible or short columns, and legs that spread flat let you get the camera close to the ground. A geared macro rail on an Arca clamp makes fine focus easier. Ensure the apex has enough clearance for your camera to fit between legs in low positions.
- Travel video: A compact fluid head or a ball head with a panning base and heavy drag improves pan smoothness. Practice adding a simple cord between the apex and a foot to tension the system during pans. Keep movement slow and deliberate to avoid oscillations.
- Airlines and trains: Some airlines check carry-on dimensions tightly. A folded length under 40–42 cm is easier to keep inside your bag. If security asks, a tripod is a camera support; store it internally to avoid debates. Avoid strapping it externally during boarding where it can snag or bump passengers.
Think about access and routine. If the tripod lives on the outside of your bag, use a secure strap and a pocket that supports its weight. If it lives inside, fold locks away from fabric to avoid snags and practice a smooth extraction and setup at home. One minute to level and lock is a realistic target for travel pace; if it takes longer, refine your sequence or choose a simpler design.
Budget tiers and real expectations
Prices vary widely, and there are meaningful differences between budget, mid-range, and premium tiers. Setting expectations guards your wallet and avoids disappointment later.
- Entry (up to ~US$150): Typically aluminum legs with flip locks and a simple ball head. Heights are shorter, locks may need periodic tightening, and stiffness is modest. Great for phones, compacts, and light mirrorless primes. Expect more care in wind and fewer keepers at 30 seconds.
- Mid (~US$150–300): A sweet spot for many travelers. You’ll find lighter legs, better machining, Arca clamps, and sometimes carbon options. Heights without the column improve, and the overall experience feels more confident.
- Premium (~US$300+): Stiffer legs at low weight, excellent locks and apex design, and precise heads. If you often shoot in wind or with heavier glass, the difference shows immediately in the tap test and your night exposure hit rate. Premium builds also stand up better to frequent travel.
Spending more doesn’t make you a better photographer, but a tripod that you trust changes your behavior. You bring it, use it, and keep exploring when light drops instead of packing up early. If you only use a tripod occasionally, a mid-tier model is excellent value. If you regularly shoot blue hour, city nights, or coastal sunsets, premium stiffness pays back over years of use.
Accessories, hacks, and field setup
Small accessories extend what a travel tripod can do and make setup less fiddly. Pack only what you’ll use, and practice with your kit at home to make muscle memory.
- Alternative feet: Keep rubber feet for pavement and galleries. Add spikes for dirt, grass, and ice. Quick-change feet without tools are convenient when the surface changes every block.
- Short column or columnless plate: Many brands sell a short column for low positions. Some let you remove the column entirely and mount the head to a flat plate, which is the stiffest configuration and useful in wind.
- Strap or cord: A light cord from the apex to a foot creates preloaded tension and reduces yaw during pans. Use with care so you don’t trip yourself or nearby people.
- Arca ecosystem: L‑brackets keep your camera centered for verticals. Macro rails, nodal rails, and clamps for quick accessory swaps reduce fumbling during a busy shoot day.
- Hook weight: Fine for light sandbags or a small pouch of stones picked up on site. Avoid hanging sloshy bottles that swing; they add motion rather than stability.
Field routine matters. Practice leveling quickly: set two legs to the same length, use the third for fine adjustment, then rotate the head’s panning base to level horizons while keeping the legs planted. If your head creeps, back off a little, reset friction, and relock firmly. Keep spare plates and a tiny hex key in your bag; the best shot often happens when you least expect it, and you don’t want a loose clamp to interrupt it.
Care, maintenance, and longevity
Travel introduces grit, salt, and accidental knocks. A simple routine keeps locks smooth and confidence high. Maintenance doesn’t require a bench or special tools—just attention and a few minutes after rough sessions.
- After sand or salt: Rinse legs with fresh water as soon as practical. Extend and collapse a few times during the rinse to flush grit. Dry everything fully before storage to avoid corrosion. Twist locks last longer when kept clean and dry.
- Check screws and collars: Inspect apex bolts, leg pivot screws, lock collars, and the head mount monthly if you travel frequently. A small tighten restores crisp lock feel and reduces creeping.
- Lubrication: Avoid greasy lubricants near locks—they attract grit. A small amount of dry lube on threads can help in arid climates. If your brand publishes a maintenance guide, follow their advice for disassembly order and torque.
- Storage and transport: Remove the head or wrap it before flights to protect knobs and clamps. Keep plates on cameras so you’re never hunting at sunrise. If you store for long periods, loosen locks slightly so seals aren’t under constant compression.
Good care is less about fuss and more about friction—reducing the friction of setup next time. When your locks spin smoothly and legs extend cleanly, you’re more likely to use the tripod in marginal light, which is where the tool pays for itself.
Quick buyer checklist and sample shortlists
Use this concise checklist to decide in five minutes. Write your priority next to each item with a number or note. If you answer yes to most bullet points, you’re close to a confident purchase.
- Height without the column reaches within 10–15 cm of your eye line with your usual shoes.
- Weight stays at or below your personal carry limit for a full day—write the number on a tag inside your bag.
- Folded length fits inside your favorite backpack or carry-on horizontally without sticking out.
- Leg locks feel secure with one hand and don’t pinch. You can deploy all legs to working height in under 60 seconds.
- Arca‑Swiss clamp or compatible system on the head; safety stops or captive screws present.
- Tap test settles quickly with your heaviest lens; the head doesn’t creep during a two-minute wait.
- Leg angles and apex design allow a low position for macro and a stiff stance in wind.
- Head offers separate pan lock and friction control; lock strength suits your heaviest setup.
Build a shortlist by kit type using brand‑agnostic archetypes. These combinations cover most travel kits in 2026 without naming specific models that change yearly.
- Phone/compact camera: Mini tripod or sub‑1 kg travel tripod with a tiny ball head and Arca clamp. Height is secondary to folded length and speed, since you’ll stabilize a very light device.
- APS‑C or full‑frame mirrorless with small primes: Carbon or aluminum around 1.2–1.4 kg, four sections, compact ball head, ~135–145 cm without the column. This balances stiffness with daily carry comfort.
- Mirrorless with 70–200/100–400 zoom: Stiffer three‑section carbon around 1.4–1.6 kg, ~140 cm without the column, and a stronger ball head or compact fluid head for video. Bring spikes for grass and soft ground.
- Hybrid stills/video traveler: Travel tripod with a removable head mount (3/8 in), a compact fluid head in the bag, and Arca plates across all gear so switches are seamless.
If you want a deeper dive into gear fit and repeatable testing, browse our home base at ePhoto Life. We organize lens and tripod guides around the same tests described here so your comparisons stay consistent and practical across articles.
What a real‑world upgrade feels like
Many buyers wonder whether moving from an entry tripod to a mid-tier or premium set is worth it. The difference shows most in transient conditions: gusts on a bridge, the subtle shake from subway vibrations under a city street, or macro shots where even tiny oscillations matter. With a stiffer leg set and a head that locks confidently, you’ll notice less re-composing after locking, fewer soft frames at 10–30 seconds, and faster setup thanks to smoother locks and clearer detents.
Another tangible change is ergonomic: better knobs and locks are easier on your hands, especially in cold or with gloves. More robust apex designs twist less when you pan or reframe quickly. And because the leg set becomes less frustrating, you’ll deploy it for shots you previously skipped—blue hour city scenes, inside dim cathedrals with permission, or night markets where handheld ISO would compromise image quality. That behavioral change—using the tripod more often—is the real upgrade.
The best travel tripod: a reality check
There’s no universal champion, only a smart match. Decode the numbers for your height and pack, test stiffness with your own kit, pick a head that locks without creep, and set a routine that gets you to level quickly. If you do, you’ll bring the tripod more often and make the photos you bought it for. When in doubt, revisit your non-negotiables and the checklist above. If a tempting sale model fails two items, remember that the best travel tripod is the one you carry and trust, not just the one that looks good on a product page.