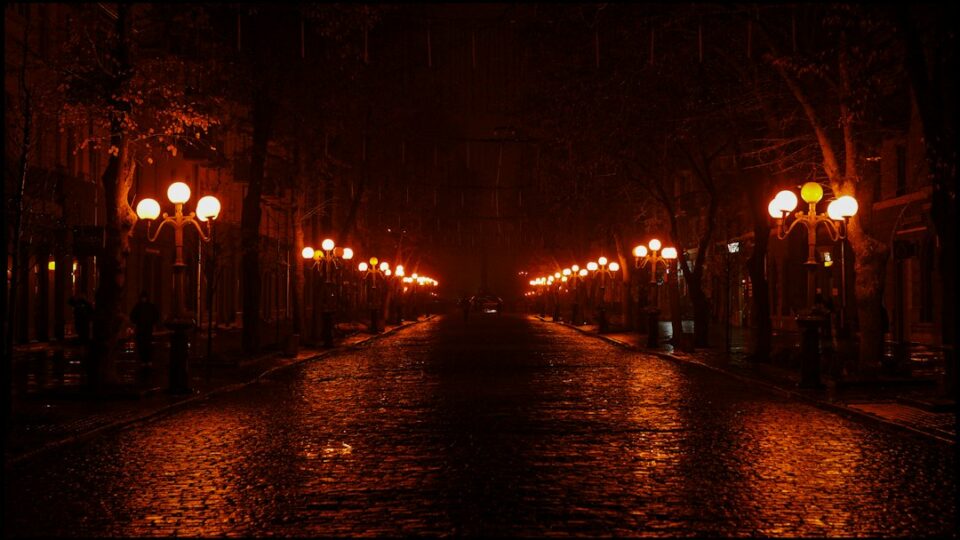
If you have ever raised your camera toward neon-lit sidewalks and wondered why your files look muddy or blurry, this guide to low light street photography will help you make steady, confident choices at night. You will learn which exposure settings to prioritize, how to pick and use the right lenses, where focusing breaks down and how to stabilize it, and how to shape color and grain so your photographs feel like the city after dark.
low light street photography
Night streets compress time into small pockets of light: signs, phones, bus stops, café windows, oncoming headlights reflecting from wet asphalt. Those pools are your raw material. The trick is to control motion and focus so your timing and composition can do the heavy lifting. A simple way to frame each decision is to ask two questions before you click. One, do I want to freeze motion or let it blur? Two, do I want the background to separate or to read as part of the context? The answers determine shutter speed, aperture, and ISO, and point you toward a look that suits your intent rather than fighting the light available.
Think in looks rather than in settings alone. Crisp, frozen gestures in high-contrast light feel different from smoky, slow-shutter scenes where brake lights draw lines across the frame. Both can be compelling. Both demand intention. You will handle the same camera very differently depending on which look you want, and when you decide that early, the rest of the night becomes a rhythm rather than a gamble.
Exposure foundations after dark
At night, shutter speed governs how people and traffic register. Start there. If you need a person walking to look crisp, 1/250 s is a reliable baseline. When the subject is pausing or turning, 1/125 s to 1/100 s may hold with good timing and steady hands. If motion trails are part of the picture, nudge downward to 1/30 s, 1/15 s, or even slower when you can brace yourself or use support. Choose the minimum shutter speed that delivers the motion you want, then open the aperture as needed and let ISO rise to meet the scene.
Aperture at night often lives between f/1.4 and f/2.8 for fast primes, or f/2.8 to f/4 on zooms. Wider apertures gather light and calm ISO, but trim your depth of field. That shallow plane can be an asset when you want faces to pop out of a messy background. It can also punish sloppy focusing. When you stop down to f/4, f/5.6, or f/8, you regain depth for street layers—foreground silhouettes, mid-ground subjects, background signs—but you also trade light, so be ready to raise ISO or drag the shutter if the look suits the scene.
ISO is the pressure valve. Modern sensors handle ISO 3200, 6400, and 12800 better than many expect, especially when you expose thoughtfully and process with intention. Grain need not be the enemy; it can contribute texture and mood in a night series. What matters most is preserving useful detail in the midtones and highlights. Aim to keep critical faces and bright edges intact, accept that deep shadows will carry some noise, and let the character of the street carry the rest.
Metering modes respond erratically to point lights and black clothing. Center-weighted or spot metering can be useful when your subject sits in a small pool of light. Evaluative modes work too if you ride exposure compensation aggressively. Protecting highlights around faces is often worth a slight underexposure that you lift later. RAW capture gives you latitude for tonal finesse, and a quick histogram glance after a test frame can spare you from a clipped sign bleeding into a face you care about.
Cameras, sensors, and file formats for the night
Any modern interchangeable-lens camera can make strong night photographs, but some characteristics make your job smoother. A sensor with good high-ISO dynamic range preserves midtone detail when you lift shadows. Dual-gain or dual-native ISO designs found in many recent sensors can deliver cleaner results at certain ISO thresholds; study your camera model and test where the image holds up best. In-body stabilization (IBIS) helps you steady static scenes at slow shutter speeds, though it does not freeze subjects in motion. A responsive viewfinder that stays bright enough to compose in near-darkness also pays dividends, and a body with large, tactile dials reduces menu-diving when you should be watching the street.
Set your camera to record full-resolution RAW files. Compressed RAW formats from many brands are efficient and typically retain the necessary latitude. If your camera offers HEIF/HEIC with 10-bit tonality, it may be useful for quick sharing, but do not rely on it for heavy lifting when deep edits are expected. Consider enabling highlight zebras or peaking-style highlight warnings for exposure; those simple overlays make it easy to guard faces against clipping under neon.
Custom function buttons earn their keep at night. Map one to ISO, one to switching AF modes, another to magnify or peaking for manual focus. Save a dedicated night shooting preset that loads your preferred shutter speed baseline, Auto ISO limits, single-point or small-zone AF, and RAW capture. That one action gets you out of your front door and into a shooting state with fewer decisions to remember in the half-light.
Lenses and gear that make the night easier
Fast primes simplify decisions and elevate consistency after dark. Popular full-frame choices include 28mm f/1.8, 35mm f/1.4 or f/1.8, 50mm f/1.4 or f/1.8, and 85mm f/1.8. On APS-C, a 23mm f/1.4 approximates a 35mm field of view; a 16mm f/1.4 feels close to 24mm on full-frame. The wider focal lengths help you stay near the action without losing context, and their depth of field at the same f-number is deeper than longer lenses, easing focus a bit. Zooms like a 24–70mm f/2.8 or 24–105mm f/4 add flexibility for framing but push ISO higher; pair them with stable handholding habits and expect to rely more on Auto ISO.
Stabilization is tremendously helpful for static elements but will not stop a jogger or cyclist from blurring. Learn how your stabilization system behaves at slow speeds. Some photographers can hand-hold a 35mm lens at 1/10 s or 1/6 s with IBIS and careful bracing; others benefit from bracing against a wall or lamppost at 1/15 s. A small folding seat pad or a lightweight clamp can serve as a makeshift support for a multi-second exposure on a railing. Filters usually do more harm than good at night; remove protective glass to reduce flare and keep a lens hood mounted to cut stray oblique light.
A few small accessories raise your success rate. Thin gloves preserve fingertip feel in cold air. A microfiber cloth or chamois is essential in drizzle or mist. Spare batteries matter; cold nights, live view, and focus aids drain power quickly. A compact, low-lumen flashlight helps you find buttons without overwhelming your night vision. For wet weather, an inexpensive rain cover or even a resealable bag with a hole for the lens can protect the body without advertising itself.
Focus with confidence when light is scarce
Autofocus systems improve every year, yet night light still reveals their limits. To give the AF module the best chance, choose single-point AF or a small zone and aim at a high-contrast edge in the light: a rim-lit cheekbone, a hat line against a sign, a hand holding a phone. Eye-detection can be effective when the face occupies enough of the frame and the light is distinct; when it hunts, do not hesitate to switch back to a specific point or to manual focus for a beat.
Back-button focus separates the act of focusing from releasing the shutter, making it easier to pre-focus and wait. If you photograph people crossing into predictable pools of light, lock focus on the spot where they will be, then watch the rhythm of the street and fire when subjects enter that box. For static subjects, focus magnification plus peaking can be precise even at f/1.4. In very dim light, temporarily raise ISO to brighten the electronic viewfinder, nail focus, and then drop ISO back to your working range. With wide angles, zone focusing remains powerful: at f/8 on a 28mm lens, set focus around 2–3 meters and most of the near-to-mid scene will be acceptably sharp. Combine zone focus with careful positioning at crosswalks or market aisles and you can work nearly as fast as in daylight.
Continuous AF with a modest tracking sensitivity helps with moving subjects that stay within a small area. Keep the active point where the light and contrast are strongest. Fire short bursts to hedge against micro-misfocus, and review at 100% during a lull to verify that the camera, lens, and technique are cooperating in that light. Adjust quickly when they are not: slow the subject down by waiting for pauses, or recompose so the focus point lands on a brighter edge.
Working with color, white balance, and mixed light
Night is a patchwork of color temperatures. Sodium lamps bathe scenes in amber, many LEDs skew cool with hints of cyan or green, and neon pours saturated primaries into the frame. You can lean into these hues or tame them for consistency. Both choices are valid; the key is to decide rather than letting the camera drift unpredictably across a series.
If you want cohesive color across a project, pick a fixed Kelvin value—say 3200K for tungsten-leaning blocks or 4000K for mixed LED—and shoot your whole walk that way. Faces under warm lamps will read warm, LEDs will go slightly blue, and your grade will harmonize in post. If you prefer spontaneity, Auto WB is surprisingly capable in many cameras; it will get you close enough, and you can refine later. Use your RAW editor’s HSL tool to corral runaway greens and magentas. When neon dominates, target local white balance corrections so skin tones remain believable while signs stay bold.
Reflections and color contrast are night gold. Wet streets double the light sources and saturate color when you lower your angle. Place a cool-lit subject against a warm background to create snap, or chase analogous hues—magenta and purple—to create a dreamlike unity. If mixed light creates garish patches, shift your position slightly until one color family dominates the subject you care about. Small movements often fix what global adjustments cannot.
Motion, mood, and creative effects
Motion injects life into night scenes. When everything is tack-sharp, the city can look frozen. Carefully controlled blur suggests energy and passage. Try panning cyclists or scooters at 1/30 s; follow the rider smoothly through the frame and fire short bursts so one or two frames land subject-sharp against streaked architecture. For light trails, anchor on a solid background—brick, concrete, signage—and experiment from 1 to 8 seconds while traffic flows. If you have no tripod, brace against a pole, press the camera into a corner, or rest it on a backpack on a low wall to tame the wobble.
Shutter drag portraits add a crisp anchor to an otherwise fluid background. Ask a friend to stand in window light or near a sign, then use a small off-camera flash or a handheld LED bounced off a nearby wall. Set 1/10–1/2 s so ambient lines paint the frame while the flash or bright bounce freezes your subject at the end of the exposure. If you avoid flash, you can still create a similar anchor by timing a subject’s stillness during the slow exposure—a brief glance down at a phone, a pause to light a cigarette, a breath held at a crosswalk.
Not every frame needs a special technique. Sometimes the mood comes from restraint. Let deep blacks stay black where no meaningful detail exists, keep faces luminous where they matter, and allow a little grain to hum so the picture feels like the hour when you made it. Layered with disciplined timing, those quiet choices produce images that wear well in a series.
Composition, timing, and storytelling in the dark
Because night pushes the eye toward brightness, composition benefits from guiding the viewer through those bright points with purpose. Place silhouettes against café windows so gestures read cleanly. Use frames within frames: bus shelters, doorways, tram windows, and stair rails. Work lower to turn wet pavement into a second plane that reflects signs and faces. Glass storefronts are spontaneous collage machines; watch how a person inside aligns with pedestrians and buses outside, and press the shutter when layers rhyme.
Timing still wins the night. On a busy corner, people gather, wait, cross, and disperse in repeating cycles. Stand still long enough to sense the rhythm. Pre-compose with a strong background and a pool of light, then wait for a subject to enter the frame with a gesture that completes the picture. Facial expressions, hand positions, the swing of a coat, or a look shared between strangers—all of these speak louder at night because the light isolates them. Patience and a fixed spot often make you invisible; the street flows around you and moments resolve naturally.
Story thrives on details. A vendor wiping condensation from glass, steam lifting from a food cart, a busker adjusting a scarf between songs—small human signals carry emotion. Night also invites a respectful proximity. You are usually closer than in daylight because the light is scarce and concentrated. That proximity can feel intimate; match it with a quiet presence and relaxed body language so your subjects can ignore the camera or acknowledge it without tension.
Safety, etiquette, and fieldcraft
Comfort and awareness amplify your creative attention. Share your route with a friend or bring a companion for unfamiliar neighborhoods. Keep your strap secure and your bag minimal so you are less encumbered in crowds. Avoid stepping into traffic for a dramatic angle; pick a safe footing and treat the curb as a live edge. Watch blind corners and narrow alleys where sudden motion can surprise you and others.
Etiquette keeps encounters smooth. Avoid shining bright lights in faces without consent. If someone notices you and appears uneasy, offer a small nod and step back. Many vibrant pictures are made with a split-second of recognition that does not feel confrontational. On private property such as indoor malls or some transit hubs, rules about photography may be posted or enforced; weigh the story you want against the likelihood of interruption and choose the path that lets you keep working through the night.
Fieldcraft also covers weather and gear care on the go. Wipe lenses quickly when mist builds. Keep a cloth in a pocket you can reach without looking down. If rain picks up, find an awning, bus shelter, or doorway that lets you keep shooting while staying dry. Your presence should feel like part of the street, not a disruption to it.
From capture to edit: a reliable workflow
A simple on-location discipline speeds editing later. Shoot RAW, obviously, and add temporary ratings in-camera during brief pauses so you can find strong sequences when you import. If your camera supports voice memos or in-camera notes, use them to tag specific experiments or locations worth revisiting. Back home, import and perform a fast pass to cull outright misses, then a second pass to flag selects. Choose one or two representative frames to build a grade before syncing it thoughtfully to the rest.
Editing at night is a balancing act between highlight protection and shadow lift. Start with white balance to set the overall mood—warmer for cozy markets, cooler for stark LED-lit platforms. Adjust exposure until faces and midtones breathe, then pull highlights gently to control signs and reflections. Lift shadows sparingly; in many scenes, deep areas can stay deep if they do not carry information you need. Tone curves, local masks, and color-range tools help you isolate areas so you do not flatten contrast across the board.
Noise reduction works best after global tonal choices are in place. Apply luminance NR conservatively to retain texture, and dial back chroma speckle a bit more aggressively. Sharpen with restraint, increasing radius slightly at high ISOs so edges feel present without looking brittle. If you enjoy the character of film, consider adding a controlled grain overlay at the end rather than leaving random sensor noise to define the frame. For social media output, export at sizes the platform prefers and add a modest dose of output sharpening to counter compression. For prints, prioritize texture preservation and test a small print before committing to a large format.
Scenarios, checklists, and a 30‑day practice plan
Different night locations shift your settings and your approach. Use these scenario guides as quick reference, then lean into a month of structured practice to make them second nature.
Neon storefronts: Expose for faces in the glow, accept that neon may clip a little and still read boldly. Watch for LED flicker; small changes to shutter speed can remove banding (1/100 s or 1/60 s often behave differently near signs). Move your angle to tune reflections; a polarizer costs light and rarely helps after dark.
Markets and food carts: Light is mixed and often harsh. Step to the side where steam softens it, or wait for a vendor to pivot into a better angle. If you want bustle sharp, start at 1/250 s. If you want hands to blur while faces remain readable, try 1/60–1/125 s and time your shots when faces pause. Do not block customers; stay nimble and courteous.
Transit platforms: Trains and buses create reliable rhythms. Pre-focus on the spot where doors open. Try 1/15–1/30 s for sweeping motion as a train enters, then jump to 1/250 s for glances through windows once the vehicle stops. Respect platform edges and local regulations.
Rainy nights: Treat the street like a mirror. Lower your angle so reflections double your light sources. Backlit raindrops sparkle at 1/250 s and streak into threads at 1/30 s. Keep a cloth handy and protect your lens from wind-driven spray.
Quiet residential blocks: Light levels are lower, but atmosphere is rich. Use wider apertures and higher ISO. Move slowly and listen; photographs here tend to be gentler—silhouettes, shadows on walls, a dog walker under a porch lamp, someone locking a bike.
Pack these compact checklists in your bag or phone for quick recall:
- Settings baseline: Manual or Shutter Priority; 1/250 s for people; 1/125 s for relaxed rhythm; Auto ISO with a ceiling you trust (6400–12800); RAW; highlight warnings on.
- Focus workflow: Single-point AF; back-button focus; pre-focus on light pools; switch to manual + peaking when AF hunts.
- Color plan: Fixed Kelvin for series consistency, or Auto WB for spontaneity; decide before you start your route.
- Safety habits: Route shared; strap secure; watch curbs; avoid blocking pathways; keep profile low and polite.
- Wet weather: Hood on; protective bag or cover ready; microfiber cloth accessible; watch flare with point lights.
To grow quickly, practice on purpose for one month:
- Week 1 — Shutter discipline: Three nights, each with a different speed range. Night 1 at 1/250 s only. Night 2 at 1/80–1/125 s. Night 3 at 1/15–1/60 s with panning and shutter drag. Review at home and note how motion feels at each speed.
- Week 2 — Color: Two neighborhoods with different light mixes. One night with a fixed Kelvin; the next with Auto WB. Compare sets and decide which approach better supports your taste.
- Week 3 — Layers and reflections: Choose three recurring compositions: a café window, a crosswalk, a reflective storefront. Revisit them on different nights and in different weather. Concentrate on foreground, subject, and background alignment.
- Week 4 — Short sequences: Tell a six-frame micro-story of a recurring night ritual: buskers setting up, late diners closing a restaurant, riders waiting for the last train. Think in beats: establishing, anticipation, moment, reaction, detail, exit. Edit ruthlessly.
At the end of each week, print or layout your five favorite frames. Write one sentence about what works and one sentence about what you would try differently next time. That small reflection loop accelerates progress because you watch your own light.
Finally, plan maintenance and routine so every outing begins smoothly. Before you leave, format cleared cards, charge spares, clean lenses and the sensor if needed, and load your night preset. When you return, back up first, then air-dry damp gear outside the bag, wipe the exterior, and rotate batteries. These practical habits protect your time and attention for picture-making.
Auto ISO and exposure strategies that actually work
Auto ISO removes friction at night because it lets you anchor the look with shutter speed and aperture while ISO floats to fit the light. On many cameras, you can set a minimum shutter speed for Auto ISO so the body does not dip into blur by surprise. Try these patterns to see which fits your subjects:
- People moving briskly: Manual 1/250 s, aperture wide for light and separation, Auto ISO with a ceiling you accept for your camera. If ISO pins at the ceiling too often, consider widening aperture or choosing brighter pockets of light.
- Relaxed scenes or environmental portraits: 1/125 s or 1/80 s depending on steadiness and whether stabilization is active. Time the shutter for natural pauses in movement.
- Deliberate blur and light trails: 1/15 s down to multi-second exposures if you can brace or rest the camera. Keep ISO low when time is your light source so highlights do not blow out prematurely.
Two exposure philosophies show up often in night work. One protects highlights first, lifting shadows later so faces and bright edges remain intact. The other pushes exposure slightly brighter to keep shadows from collapsing, pulling back highlights afterward. In neon-heavy districts and on wet streets, highlight-first exposure is usually safer. In dim residential blocks, lifting shadows gently can preserve the delicate shapes that give the scene its quiet feel. Spend fifteen minutes on a single corner experimenting with both methods; reading the light you have matters more than memorizing any rule.
Noise, dynamic range, and file quality
High ISO noise is natural at night; the goal is to keep it from smothering detail or color. If your camera features “extended ISO” values, test them. Some look acceptable; others sacrifice dynamic range and are best avoided. Expose to preserve the tonal information that matters, accept that pitch-black areas can stay black, and trust your processing tools to do their share.
In post, handle noise after you set exposure, white balance, and contrast. Many RAW processors and dedicated tools now separate color noise from luminance noise well, allowing you to clean the former aggressively without wiping away fine detail. When sharpening, use a slightly higher radius and lower amount than you might at base ISO; the goal is presence, not crunch. If banding appears after big shadow lifts, back off a little and recover the impression of depth with local contrast rather than global pushes. The difference between a harsh file and a pleasing one is often restraint plus selective masks.
Dynamic range is compressed at night, yet point lights can be orders of magnitude brighter than ambient shadows. Protect those small areas of extreme brightness if they land on features you care about—eyes, hands, key signage. Use a gentle S-curve to deepen blacks where they carry no information and to give midtones room to breathe. It is fine if a night photograph keeps some mystery; not every corner needs to be visible. What matters is that the viewer’s eye lands where you want it and travels through the frame without distraction.
Planning routes, building rhythm, and learning from your files
Strong night pictures come more often when you walk the same routes repeatedly. Learn where a marquee throws light onto a crosswalk, which cafés glow at a particular hour, which intersections reflect color after rain, and where crowds gather with phones and umbrellas. Create a small map in your notes app: “Warm window at Pine & 4th after 8 PM,” “Backlit bus stop near the theater,” “Market open late on Thursdays.” On some nights, follow your plan. On others, chase sound, weather, or a pop-up stall and deliberately break the routine. The plan gives you confidence; the detours deliver surprises.
Reviewing your files with intent teaches faster than any article. Sort a contact sheet by time and study sequences. Where did focus fall apart, and why? Were you too slow on the shutter for a particular gesture? Did mixed light undermine skin tones—and could a two-step sideways have fixed it on location? Compare multiple nights with similar subjects to see how your choices shift the mood. Mark small wins: a clean silhouette against a café, a perfect glance through a tram window, a reflection you would not have seen an hour earlier. Those notes feed your next walk.
If you want more ideas that carry over to daytime shooting and other genres, browse related pieces on our site. You can start here: Photography and Life. Build your own best practices, keep your kit simple, and let curiosity lead you under the neon and the streetlights.