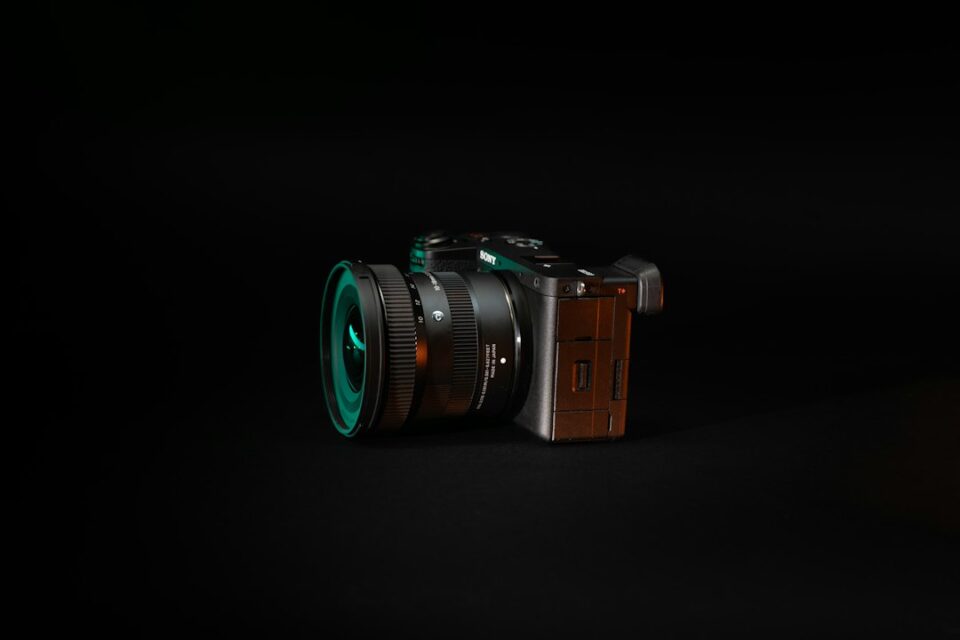
If you’ve been hunting for reliable advice, this mirrorless camera lenses buying guide is designed to help you choose with confidence in 2026. Whether you shoot portraits, streets, landscapes, wildlife, or video, the most important steps are understanding your mount, matching focal length to your subject and sensor, and making calm, evidence-based choices you can test at home and in the field.
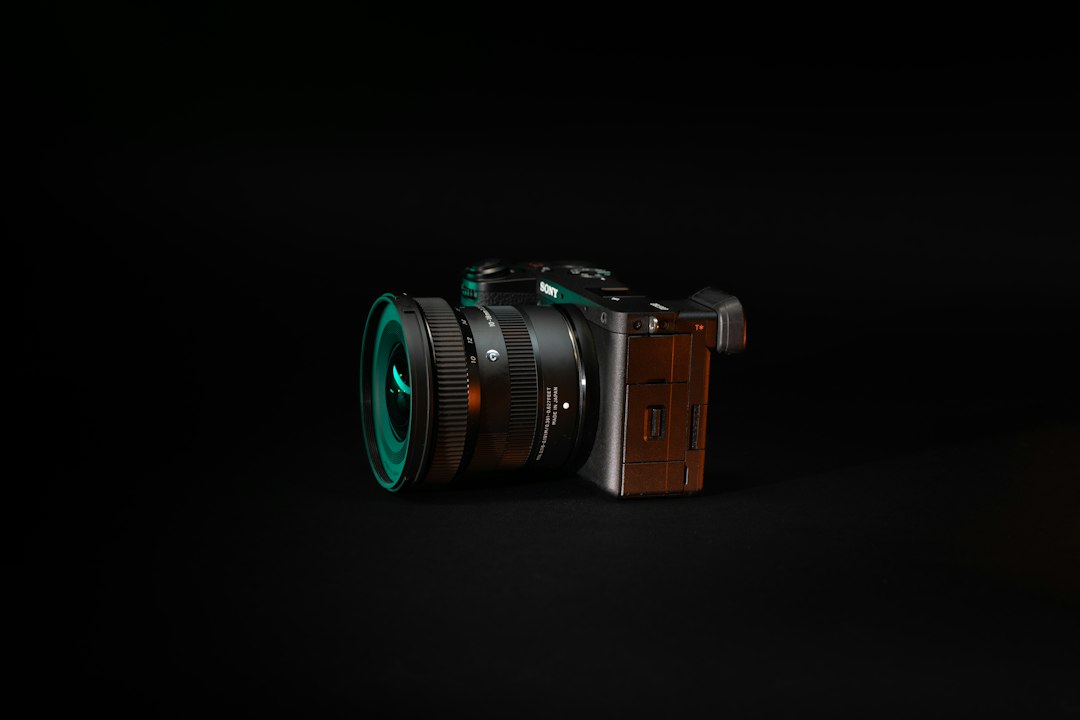
mirrorless camera lenses buying guide: quick start
Here is a quick, practical map for choosing mirrorless lenses without getting lost in jargon:
- Identify your mount and sensor size first, because these two constraints instantly filter your options.
- Define your primary subjects (people, travel, city at night, birds, events). Let the subject suggest the focal length and aperture target.
- Pick prime or zoom based on how you like to work: do you enjoy composing with your feet and the discipline of one focal length, or do you prefer flexibility in changing scenes?
- Decide your minimum needed aperture in real scenarios. Do you actually need f/1.4 for portraits at dusk, or is f/2.8 enough when your camera’s high ISO is great?
- Consider AF behavior, stabilization, and video features if you shoot both photo and video. Linear motors, breathing control, and quiet focus matter.
- Check optical quality beyond sharpness: distortion, flare resistance, color rendering, focus breathing, and bokeh character.
- Set a budget envelope that includes a protective filter, a lens hood if missing, a simple cleaning kit, and possibly an adapter or teleconverter.
- Run a hands-on test before you commit: focus accuracy, decentering checks, real-world framing, and how the lens feels on your camera.
Bookmark this page, and if you want more gear walkthroughs and sample-focused articles, you can always start at ephoto-life.com.
Mounts and sensor formats: compatibility without confusion
Mirrorless systems have multiple mounts: Canon RF and RF-S, Nikon Z (FX and DX), Sony E (full-frame and APS-C), L-Mount (Leica/Panasonic/Sigma), Fujifilm X (APS-C), and Micro Four Thirds (MFT). Each mount has its own lenses. Cross-mount use generally requires adapters, and results vary depending on electronics and flange distance. Two quick rules keep you safe:
- Mount first, sensor second: A Nikon Z lens fits Z bodies; a Sony E lens fits Sony E bodies. Within a mount, ensure the lens covers your sensor size. A full-frame lens works on full-frame and usually APS-C with a crop factor; an APS-C lens may vignette on full-frame unless your camera auto-crops.
- Adapt carefully: Adapting DSLR glass (EF, F, A-mount) to modern mirrorless often works well with quality adapters. Adapting between mirrorless mounts (for example, Sony E to Canon RF) is far more limited for autofocus. Mechanical adapters for purely manual focus lenses are widely feasible; electronic adapters are case-by-case.
Understand sensor formats too. Full-frame is 36×24 mm; APS-C is smaller (roughly 1.5× or 1.6× crop); MFT is smaller again (2× crop). The smaller the sensor for the same focal length and aperture, the narrower the field of view and the deeper the depth of field at the same framing and f-number. None is inherently better; each has strengths:
- Full-frame: Wider true angles of view at a given focal length, shallower depth of field potential, often stronger low-light performance.
- APS-C: Reach bonus for wildlife/sports with smaller, lighter teles; solid balance of cost, size, and quality.
- MFT: Very compact lenses, deep depth of field for run-and-gun video and travel, excellent stabilization ecosystems.
Build choices around what you shoot and how you carry gear. A travel photographer with a compact priority might lean MFT or small APS-C primes, while a portrait specialist who loves background blur might prefer full-frame plus fast primes.
Focal length and field of view: what numbers mean on your camera
The focal length determines how tight or wide your field of view feels. Mapping focal length to common subjects helps you get it right the first time. Use these guidelines as a starting point and adjust for your sensor crop:
- 14–20 mm (FF): Ultra-wide vistas, dramatic interiors, astrophotography. On APS-C, think 10–14 mm; on MFT, 7–10 mm.
- 24–35 mm (FF): Environmental portraits, travel, street; natural-feeling perspective if you stay near eye level. On APS-C, think 16–23 mm; on MFT, 12–17 mm.
- 35–50 mm (FF): Classic “normal” views, storytelling portraits, food, small product. On APS-C, 23–35 mm; on MFT, 17–25 mm.
- 75–105 mm (FF): Portraits with gentle compression; flattering perspective. On APS-C, 50–70 mm; on MFT, 42.5–60 mm.
- 200–600 mm (FF): Wildlife and field sports. On APS-C, 135–400 mm gives similar reach; on MFT, 100–300 mm is common.
Field of view is what you see in the frame, and it changes with sensor size at the same focal length. A 35 mm lens acts like ~50–56 mm on APS-C and ~70 mm on MFT for framing. That’s why crop sensors make telephoto work more approachable, while full-frame feels roomier at the same focal length for landscapes and environmental portraits.
Three practical tips:
- Pick by scene, not by numbers: Imagine the frame you want. Do you want to include the whole room or isolate a face? Choose the focal length that produces the frame from your usual distance.
- Use a zoom to find your favorite primes: If you’re unsure, start with a 24–70 mm or a 28–75 mm equivalent. Review EXIF after a month; buy primes at your most-used focal lengths.
- Respect working distance: Ultra-wides at close distances distort faces; long lenses at too close range flatten unflatteringly. Step back or forward to use perspective wisely.
Prime vs zoom: speed, flexibility, and image quality tradeoffs
Primes are single focal length lenses; zooms cover ranges. Neither is automatically better. The best choice is the one that fits your shooting style and practical needs:
- Primes: Often smaller, lighter, and brighter (f/1.2–f/2 class). They encourage deliberate composition and deliver shallow depth of field with strong low-light capability. Rendering (bokeh, microcontrast) can be characterful. You move your feet more, which can be a creative advantage.
- Zooms: Versatile, fewer lens changes, and fast coverage of scenes—ideal for events, travel, and documentary. Modern high-end zooms are impressively sharp with great AF. They’re usually f/2.8 or f/4 through the range, so less blur in bright daylight is easy, but at night you may raise ISO.
Decision pointers:
- People photography: Many love a 35/1.4–1.8 and 85/1.8 pair. For events, a 24–70/2.8 replaces several primes in one body.
- Travel: A compact 24–105/4 covers almost everything with one lens; add a small 35/1.8 or 50/1.8 for night scenes.
- Wildlife: Telezooms like 100–400, 150–500, or 200–600 shine; primes like 300/4 or 400/4.5 deliver reach and speed with less weight than older designs.
Cost per photo matters too. If a fast prime lets you shoot handheld in dim restaurants at ISO levels your camera handles well, it may be worth it over a heavier zoom. If you change lenses constantly and miss moments, a zoom is a smarter first buy.
Aperture, depth of field, and low-light performance
Aperture (the f-number) controls the light entering the lens and the depth of field. Lower f-numbers (f/1.2–f/2) let in more light and create shallower focus; higher f-numbers (f/8–f/16) deepen focus. Consider how you’ll actually use the lens:
- Portraits and details: f/1.4–f/2.0 primes produce creamy backgrounds and subject separation. But even f/2.8 on longer lenses compresses backgrounds nicely with good working distance.
- Landscapes and architecture: f/5.6–f/11 is common for front-to-back sharpness. Use a tripod when possible; many mirrorless bodies have excellent stabilization that helps when people aren’t moving.
- Events and low light: f/1.8 primes or f/2.8 zooms are popular. Remember that modern cameras handle higher ISO well; sometimes f/2.8 is plenty while keeping AF reliable.
Depth of field also depends on subject distance and focal length. Close-up with a 50/1.8, the focus band can be razor-thin; step back and it widens. A practical method is to visualize the scene and ask yourself how much of the background should be recognizable. Buy the fastest lens you’ll routinely use wide open, not the fastest number you’ve seen on a spec sheet.
Two more considerations:
- Stabilization vs aperture: Stabilization helps with static subjects at slower shutter speeds, but it doesn’t freeze a moving person. If your subjects move, faster aperture or higher ISO is the fix.
- Diffraction and sweet spots: Most lenses are sharpest around f/4–f/8. Stopping down further increases depth of field but may soften fine detail slightly due to diffraction. Don’t chase perfect lab numbers—chase pictures you like.
Autofocus behavior and video considerations
Beyond “fast or slow,” autofocus quality includes repeatability, subject stickiness, and quietness. Modern mirrorless lenses often use linear motors, STM, or ring-type motors that balance speed with smoothness. For hybrid shooters who do both photo and video, pay attention to the following:
- Focus motor noise: A quiet motor avoids being picked up by onboard mics. If you record audio on-camera, this matters a lot.
- Focus breathing: As focus changes, does the angle of view shift noticeably? For video, strong breathing can distract; some bodies offer breathing compensation with certain lenses.
- Manual focus feel: A linear, predictable MF response helps both stills and video. Focus-by-wire can be fine if the response is consistent and there’s a clutch or scale.
- AF transitions: In video, you might want smooth, slower racking; in stills, you want speed. Some systems let you adjust AF transition speed and sensitivity in the body menus.
Test how your body and lens work together. Eye-detect AF is excellent across modern systems, but performance differs in backlight, low light, and with busy foregrounds. If you often shoot people backlit by windows or stage lights, test for hunting and whether you can set AF limits or zones to help.
Optical quality: sharpness, distortion, and rendering
Image quality is more than center sharpness at one aperture. A balanced assessment includes:
- Center and edge performance: Some lenses are tack sharp centrally wide open but need stopping down for corners. Landscape shooters care more about edges; portrait shooters prioritize center rendering and bokeh.
- Chromatic aberration (CA): Look for color fringing on high-contrast edges. Modern profiles correct much of this in-camera or in raw converters, but strong longitudinal CA (color before/behind focus) can persist wide open.
- Distortion and vignetting: Many mirrorless designs rely on in-camera corrections. That’s fine for most use cases. For architecture, low native distortion (or reliable profile correction) matters; vignetting is often a creative plus and easy to correct if unwanted.
- Flare and ghosting: Point the lens near bright sources to see how it behaves. Good coatings and hood design help retain contrast in backlight.
- Rendering and color: Not all sharp lenses draw the same. Some have punchy microcontrast and neutral color; others render smoother and warmer. You’ll notice it most in skin tones and foliage.
MTF charts can be useful, but treat them as one data point. Look for field curvature (planes of focus bending), astigmatism, and sample variance reports across reviewers. Ultimately, evaluate with photos you actually take: portraits against messy backgrounds, city lights at night, or foliage in wind.
Specialized lenses: macro, wide, telephoto, and more
After a general-purpose prime or zoom, specialized lenses expand what you can shoot:
- Macro: A true 1:1 macro lens reproduces subjects at life-size on the sensor. They’re superb for nature details, product shots, and textures. Look for good working distance (90–105 mm FF equivalent or more) if you photograph insects.
- Ultra-wide: 14–20 mm FF-range captures tight interiors and epic skies. Rectilinear designs keep straight lines straighter; fisheyes intentionally curve lines for a creative look.
- Telephotos: 70–200, 100–400, 150–500, 200–600 zooms cover sports and wildlife. Pair with high-ISO-capable bodies and fast AF. Primes like 300/4, 400/4.5, or 500/5.6 balance reach and weight well.
- Tilt-shift and perspective control: For architecture and product work, these lenses let you correct converging lines in-camera and control plane of focus for precise looks.
- Cinema-oriented lenses: Cine zooms and primes offer declicked apertures, standardized gearing, and controlled breathing. They’re heavier and often manual, but make video work repeatable and smooth.
Choose specialized lenses once you’ve met your daily needs. If your weekly routine includes macro or wildlife, a dedicated lens pays off. If it’s a once-per-year trip, consider renting to learn what you truly need before buying.
Stabilization, breathing, and focus mechanisms
Stabilization appears either in the lens (OIS/OSS/VR/IS), in the body (IBIS), or both. The combined systems in many mirrorless cameras are excellent for still subjects; for moving subjects, stabilization helps you frame steadily but shutter speed still freezes motion.
Focus breathing matters if you shoot video. Even for stills, heavy breathing can change composition as you refocus. If your body offers breathing compensation, it typically works only with specific lenses. Check your manufacturer’s list if this is important.
Focus mechanisms also affect durability and feel. Internal focusing (IF) keeps the length constant and often supports better weather resistance. Some lenses include focus clutches to switch instantly between AF and manual with a tactile ring movement, plus a hard MF stop and a distance scale—great for repeatability.
Accessories, adapters, and filters that actually help
Accessories can make your lens easier to use and protect your investment:
- Lens hood: Always use it. It reduces flare, improves contrast, and offers physical protection. If the lens doesn’t include one, buy an OEM or a well-made third-party hood.
- UV/protective filter: Optional. Use a high-quality, multi-coated filter if you work in blowing sand, sea spray, or crowded events; otherwise a hood may be enough.
- ND filters: Essential for video with 180-degree shutter at bright midday and for long-exposure stills. Consider variable ND for run-and-gun, and fixed ND for optical purity.
- Polarizer (CPL): Manages reflections on glass and water, deepens skies, and cleans foliage sheen. Remember it costs 1–2 stops of light.
- Adapters and teleconverters: Use reliable brands for electronic pass-through. Teleconverters reduce light and can soften images; they’re best on sharp telephoto primes or high-quality zooms.
Keep thread sizes in mind. Step-up rings let one set of larger filters serve several lenses. If your photography often changes, standardize around one large filter size.
How to test a lens before you commit: field checklist
Hands-on testing saves time and returns. Here is a concise, repeatable process you can do in a shop or at home:
- AF sanity check: In bright and dim light, focus on a subject with texture (eyes on a portrait print, a high-contrast book spine). Check repeatability: does it nail focus several times in a row?
- Decentering: At a mid-range focal length and aperture (for zooms, say 35–50 mm at f/4–f/5.6), photograph a distant detailed scene. Examine the four corners at 100%. If one corner is much softer than the others, that copy may be decentered.
- Field curvature: Photograph a brick wall or a flat test chart parallel to the sensor. If corners are soft at the same focus distance but sharpen when you refocus slightly closer/farther, the field may be curved. Not always bad—just know it.
- Flare and ghosting: Point near a strong light, like a lamp or sun near the edge. Look for veiling flare and colored ghosts. Decide if the character is acceptable for your work.
- Focus breathing: Set up a simple rack focus from near to far while shooting a short video clip. Watch whether the framing visibly changes.
- Handling: Does the zoom ring turn the direction you like? Is the focus ring damped well? Can you reach controls without shifting grip?
For a store test, bring your own memory card so you can review files at home. Try a few copies if you suspect variance. Use your typical shutter speeds and apertures; don’t test a lens in ways you’ll never shoot.
Buying used, care, and long‑term maintenance
Used lenses can be excellent value if you inspect carefully and plan basic care. Here’s a safe, practical approach:
- External condition: Look for dents near the filter ring (could indicate a fall), scratches on glass (especially coatings), and loose rubber grips. Marks on the barrel are cosmetic; pay attention to smooth ring travel and clean clicks (if any).
- Internal check: Shine a small light through the lens at different angles. A little dust is normal. Avoid haze (a diffuse veil), heavy dust clumps, or threadlike patterns that indicate fungus. Check the aperture blades for oil and even movement.
- AF and stabilization: Mount it on your camera. Confirm AF works as expected; listen for unusual noises. If the lens has stabilization, check that it activates and behaves consistently.
- Paperwork and history: Original caps, hood, and box are a plus. Ask about age and service history if the seller knows.
For care, keep a blower and a soft microfiber cloth in your bag. Clean gently—many smudges need only a blower and a light touch. Store lenses dry with moderate ventilation; sealed boxes in humid climates can invite moisture problems. Silica gel packets can help; replace or recharge them periodically. Periodically check for firmware updates where supported (some modern lenses update through the camera body or a USB dock).
Finally, plan a simple maintenance rhythm: quick clean after dusty shoots, cap lenses when not in use, and inspect glass and rings monthly. Consistent habits do more for reliability than any single product purchase.
Budget planning and value picks by use case
Budget is not just the lens cost. Include a hood (if not included), one quality filter, a cleaning kit, and perhaps insurance if you travel frequently. As you plan, think in terms of coverage (what focal lengths you need), speed (how bright), and character (how the lens draws).
- One-lens travel kit: A 24–105/4 or similar is an efficient all-rounder. If you often shoot indoors, a small 35/1.8 adds low-light comfort without bulk.
- Portrait starter: A 50/1.8 or 85/1.8 offers lovely background blur at friendly prices across most systems.
- Landscape kit: A 16–35/4 paired with a lightweight 70–200/4 covers the spectrum with good sharpness and reasonable weight.
- Wildlife on a budget: APS-C or MFT bodies plus a 100–400 or 150–500 offer reach with manageable size. Rent longer glass for special trips.
- Hybrid video/stills: Look for lenses with minimal breathing, quiet motors, and linear MF response. A stabilized standard zoom and a fast 35 or 50 work well together.
Buy once for your actual needs, not someone else’s dream kit. If a lens sits unused for months, consider selling it and redirecting funds to something you use weekly.
Common myths, mistakes, and how to avoid them
It’s easy to overspend or choose a lens that doesn’t fit your work. These pitfalls show up repeatedly, and each has a simple countermeasure:
- Myth: “I need the fastest aperture available.” Reality: you need the slowest aperture that still fits your subjects and light. Fast glass is great when you actually shoot it wide open; otherwise, smaller, lighter, and less expensive options might be wiser.
- Myth: “All modern lenses are equal after software correction.” Reality: profiles fix a lot, but handling, AF behavior, flare resistance, and rendering character still vary and matter.
- Myth: “If I buy a superzoom, I’ll never need another lens.” Reality: convenience is fantastic, but superzooms trade some image quality and aperture speed. They’re excellent travel companions; pair one with a small fast prime for low light.
- Mistake: Ignoring weight and balance. A front-heavy setup tires your wrist and discourages shooting. Try lenses on your body and walk around the shop for five minutes.
- Mistake: Not testing for your subjects. If you shoot kids indoors, test in dim light and backlight. If you shoot architecture, test straight lines and flare.
Set a simple rule: if a lens choice makes you want to shoot more, it’s likely the right choice for you.
Quick recommendations by shooter type
These are starting points, not rigid prescriptions. Adjust for your mount and sensor format:
- Street and travel: 28–70/2.8 or 24–105/4 plus a 35/1.8. Or go minimal with a 28/2 or 40/2 prime.
- Portraits: 85/1.8 (or 56/1.4 on APS-C, 42.5/1.7 on MFT). Add a 50/1.8 or 35/1.4 for variety.
- Landscapes: 16–35/4 or 14–30/4, a compact normal prime, and a lightweight tele like 70–200/4.
- Wildlife and sports: 100–400, 150–500, 200–600, or a 300/4 prime. Prioritize AF performance and stabilization.
- Video-first creators: Standard zoom with OIS/IBIS synergy and minimal breathing, plus a fast normal prime with quiet AF and linear MF response.
As you refine your taste, you’ll discover a few focal lengths that feel like home. Build your kit around those.
Putting it all together
Choosing lenses becomes simple when you follow a practical sequence. Confirm mount and sensor coverage, pick focal lengths that match your scenes, choose between prime discipline and zoom flexibility, and set an aperture target that reflects how you actually shoot. From there, evaluate AF behavior, stabilization, and optical character with quick tests, and plan a modest budget buffer for essentials like hoods and filters.
The goal is not to own every focal length; it’s to own the lenses that make you reach for your camera. With the steps in this guide—and a few field tests—you’ll assemble a kit that serves your subjects, your back, and your creativity for years.