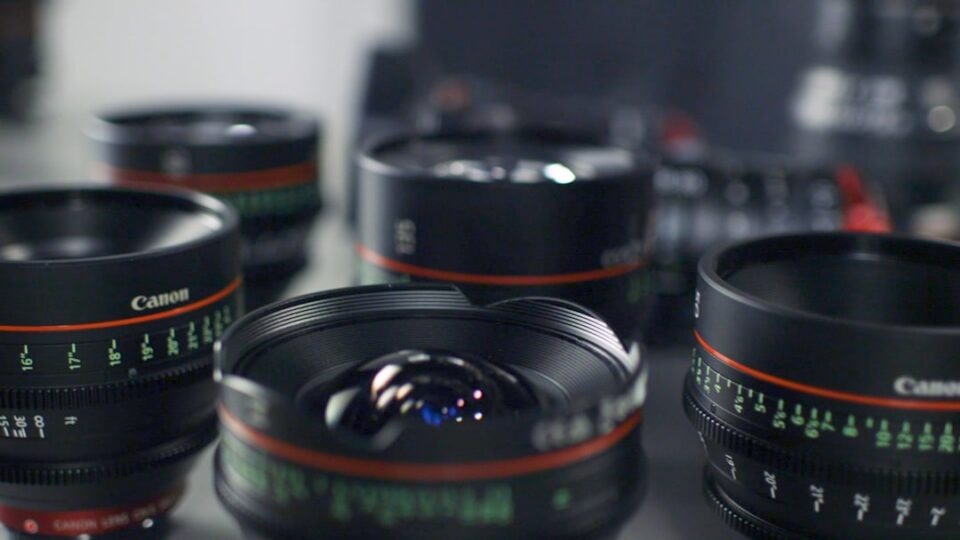
You’re about to spend real money on glass, so this camera lens buying guide focuses on the questions that help you choose with confidence. Whether you shoot portraits, travel, landscapes, wildlife, or video, the goal here is to translate specs into pictures and help you pick lenses that fit your camera, your style, and your budget.
camera lens buying guide: quick start checklist
If you only have a short window to decide, use this condensed triage to narrow choices fast. It won’t replace deeper sections, but it will help you avoid common missteps and give you a practical short list to try in real scenes.
- Confirm your sensor size. Full frame, APS-C, and Micro Four Thirds frame scenes differently and influence lens size and price. Keep your crop factor handy until it becomes second nature.
- Define the main use. Portraits, travel, street, landscape, wildlife, macro, sports, and video each favor specific focal ranges and apertures.
- Set a one-year budget across two items. Most photographers thrive with a versatile everyday zoom plus one specialty prime or zoom centered on their favorite subject.
- Decide your carry weight. A lens left at home produces no photographs. Weigh your current camera plus the candidate lens and imagine it on a long walk.
- Check mount compatibility. Native autofocus integration is usually best. Adapters can work well, but verify autofocus behavior on your camera.
- Pick a maximum aperture target. f/1.4 to f/2 for subject isolation and low light, f/2.8 for balanced versatility, and f/4 to f/6.3 for compact travel zooms.
- Plan how you will test. Borrow, rent, or shoot in-store. Photograph your real subjects under real light instead of only shelves and test charts.
- Leave room for accessories. Filters, a lens hood, a protective pouch, and a simple cleaning kit often add 5 to 10 percent to the total cost.
Fast kit templates many shooters like:
- Travel-light: 24–70mm f/4 or 24–105mm f/4–7.1 plus a compact 35mm f/2 (or 23mm on APS-C).
- Portrait-first: 85mm f/1.8 plus 35mm f/1.8 (or 56mm and 23mm on APS-C).
- Landscape-first: 16–35mm f/4 plus 50mm f/1.8 (or 10–24mm on APS-C plus 35mm f/1.8).
- Wildlife-first: 100–400mm f/5–6.3 (or 70–300mm on APS-C) plus a fast normal prime for dusk and interiors.
Two quick rules of thumb: if you photograph people in context, 35mm is a storyteller; if you focus on faces, 85–105mm is flattering. For everything else, simulate framing in your typical spaces before you buy.
Sensor sizes and crop factor: what changes and what stays the same
Sensor size changes field of view and the depth of field you perceive at a given f-number. Full frame (36×24mm) is the historical 35mm reference. APS-C is smaller and yields a crop factor of about 1.5× or 1.6× depending on brand. Micro Four Thirds is smaller again with a 2× factor. The focal length printed on a lens never changes, but the angle of view does because a smaller sensor uses a smaller portion of the lens’s image circle.
How this plays out in everyday shooting:
- On APS-C, a 35mm lens frames like a 52.5mm equivalent on full frame. That makes 35mm on APS-C a natural everyday lens that feels close to the classic 50mm perspective.
- On Micro Four Thirds, a 25mm lens behaves like a 50mm equivalent. Wide angles require shorter focal lengths, while telephotos punch in further, which is handy for wildlife with smaller, lighter lenses.
- Depth of field tends to be deeper for the same f-number at comparable framing and distance on smaller sensors. That is why many Micro Four Thirds shooters like faster glass such as a 25mm f/1.4, which helps restore subject isolation for portraits.
Ecosystems differ too. Full-frame lenses are often bigger, heavier, and more expensive, but they deliver top performance and shallow depth of field potential. APS-C systems often provide excellent reach for wildlife and sports with lighter telephotos. Micro Four Thirds can be an outstanding travel partner where portability and in-body stabilization are priorities.
If you are choosing a format today, let your primary subjects guide you. If you photograph distant animals or field sports, the extra reach of APS-C or Micro Four Thirds may help. If you want the thinnest depth of field and the largest optical catalog, full frame remains compelling. There is no wrong answer; there is only the format that best supports what you plan to shoot most often at the weight you’ll carry.
Beyond field of view, pixel pitch and resolution interact with lens performance. Higher pixel densities reveal more about a lens’s micro-contrast and edge behavior, so a lens that looks excellent on a 24MP full-frame camera may show more softness or color fringing on a 60MP body at the edges. If your body has high resolution, favor newer optical designs, or test at your typical apertures to confirm that performance meets your expectations.
One more quirk to consider is image circle coverage and vignetting. Some lenses designed for APS-C can mount on full-frame bodies in a cropped mode or even fill the frame at certain focal lengths with darker corners. If you enjoy experimentation, this can be fun; if you need consistent results, stick to glass intended for your sensor size.
Focal length and field of view: translating numbers into scenes
Focal length is more than a number on a barrel. It is a creative choice that controls how much of the scene you include and how perspective feels within the frame. The ranges below use full-frame equivalents. Convert with your crop factor if you shoot APS-C or Micro Four Thirds.
- Ultrawide, roughly 10–18mm. Exaggerated perspective, big skies, and foregrounds that become dominant when placed close to the lens. Interiors and dramatic landscapes live here.
- Wide, about 20–35mm. Environmental storytelling, street scenes, and architecture. Watch the edges for people or buildings stretched by perspective if you place them near the frame boundaries.
- Normal, about 35–58mm. A natural perspective similar to what we feel with our eyes. This is a versatile zone for documentary, travel, and food.
- Short telephoto, 85–135mm. Classic portrait focal lengths with comfortable working distances and gentle background compression.
- Telephoto, 200–400mm. Sidelines, wildlife, and distant details. Backgrounds compress significantly, which helps isolate subjects from clutter.
- Super-telephoto, 500mm and beyond. Birds, far-off wildlife, and airshows. Handling, support, and light become as important as the lens itself.
Perspective and working distance interact with focal length. A 24mm lens held very close to a face distorts features; the same lens at arm’s length to include a person in a room tells the story of the space. An 85mm lens at 1.5–2 meters smooths facial proportions and simplifies backgrounds. When people look “wide” or “flat” in your images, check your distance before blaming the lens.
Try this exercise: pick three focal lengths that interest you—say 24mm, 50mm, and 85mm. Photograph the same subject from positions that create similar framing. Compare the feel of the background, the subject’s features, and the sense of space. You will notice that the wider lens invites context while the longer lens trims distractions. That insight is worth more than ten spec sheets when choosing your next lens.
If you frequently shoot indoors, measure your rooms. Many kitchens and living rooms are around 3–5 meters across. In such spaces, 24–28mm on full frame (or 16–18mm on APS-C) leaves enough room to step back and include people without exaggerated distortion. For outdoor portraits, 85–105mm lets you stand a comfortable distance away while filling the frame nicely.
Prime lenses vs zoom lenses vs superzooms: trade-offs that matter
Primes offer a single focal length. They encourage intentional composition and usually pair wide apertures with compact designs. Zooms cover a range, trading maximum aperture for convenience. Superzooms stretch the range further for one-lens coverage on trips but pay penalties in low-light performance and optical compromises at the extremes.
When primes shine:
- You want low-light capability and subject separation. A 35mm f/1.4, 50mm f/1.8, or 85mm f/1.8 can transform available-light portraits and nighttime street scenes.
- You enjoy a repeatable look. One focal length encourages you to move your feet and develop consistent framing habits.
- You prefer discreet, lightweight gear that draws less attention in public spaces.
When zooms shine:
- You need flexibility for fast-changing scenes like weddings, events, or documentary work.
- You want to reduce lens swaps in dusty, salty, or rainy environments.
- You plan to carry two lenses that complement each other, such as a 24–70mm and a 70–200mm, to cover most assignments.
Superzooms such as an 18–200mm for APS-C or 24–240mm for full frame are travel workhorses when convenience matters more than perfect corners. Manage expectations and you can create excellent images. Stop down in good light, watch distortion at the widest end, and keep an eye on shutter speed to avoid motion blur at the longest end. For family trips, hikes, and sightseeing, the simplicity of one lens can be worth more than the last 5 percent of center sharpness.
There is also a middle ground: short-range zooms with large apertures, like 24–70mm f/2 or 28–70mm f/2. They are heavier and pricier, but they give you more background control than f/2.8 designs while remaining versatile. If you shoot events or documentary work and prefer zooms yet crave a prime-like look indoors, these hybrid lenses are highly practical.
Finally, consider handling. Some primes have focus rings positioned closer to the mount, while many zooms balance around the middle. If you do long handheld sessions, pick up candidates and swing them from low to high and left to right. A lens that balances well on your camera encourages longer, steadier shooting and less fatigue.
Aperture, bokeh, and low light: how f-numbers shape your images
Aperture controls light, depth of field, and how the out-of-focus background looks. Smaller f-numbers mean a larger opening. An f/1.8 prime admits more light than an f/4 zoom, which supports lower ISOs or faster shutter speeds under dim interiors and evening street lamps.
Depth of field and subject isolation:
- Portraits often benefit from f/1.4 to f/2.8 for separation and a gentle falloff into background blur. On smaller sensors, faster glass may be needed to produce a similar look.
- Landscapes usually rely on f/5.6 to f/11 for front-to-back clarity. Diffraction softness can appear at very small apertures; test your lens to find a sweet spot.
Bokeh is the lens’s signature in blur. Aperture blade shape, spherical aberration correction, and focal length all influence whether background highlights look smooth or busy. Two 85mm f/1.8 lenses can render blur quite differently. If you care about background character, examine sample galleries that include foliage, point lights at night, and backlit specular highlights. Better yet, borrow the lens and shoot your typical scenes at your typical distances. What you see on your own subjects matters more than what someone else sees in a test studio.
Look out for mechanical vignetting (cat’s-eye highlights near the frame edges), focus shift (a slight change in focus position as you stop down), and onion-ring structures in specular highlights. None of these automatically disqualifies a lens, but knowing how a lens draws helps you use it creatively. For astrophotography, check for coma toward the corners; for backlit portraits, evaluate how the lens handles veiling flare and whether it produces pleasing sunstars when stopped down.
Light gathering is only half the story. Stabilization and aperture interact with subject motion. Optical stabilization and in-body stabilization are excellent for static scenes at slow shutter speeds. But stabilization does not freeze a moving child or a bird. If your subjects move, a faster lens and higher ISO may be more useful than stabilization alone. Develop a mental floor for shutter speed at each focal length and raise ISO without hesitation when needed.
One nuance often missed is the difference between f-stops and T-stops. The f-number is geometric; the T-stop represents the actual transmission of light through the lens. Cine lenses are marked in T-stops for predictable exposure. Photo lenses vary slightly, but you may notice that two lenses set to f/2.8 yield slightly different exposures; coatings and element count are part of the reason.
Autofocus, stabilization, and manual focus feel: performance in the field
Modern autofocus systems are impressive, but behavior varies by mount and by lens. Linear motors and stepping motors are common in current designs and are typically fast, accurate, and quiet. Some older lenses use micro-motors or, in legacy DSLRs, screw drive from the body. Your camera’s detection algorithms do the heavy lifting, yet the lens’s design still influences acquisition speed and consistency.
- Portraits with eye detect. Test whether your body and lens consistently lock on a human eye at wide apertures. Try window light, overhead office light, and backlit situations.
- Action and wildlife. Evaluate how quickly the lens acquires and tracks subjects moving toward and away from you. Use burst mode in bright light and then again at dusk to sense the limits.
- Low light. Step into a dim corridor or a nighttime street to see if the lens hunts. Some combinations slow noticeably under tungsten or mixed LED sources.
Stabilization comes in three flavors: in-lens, in-body, and a combination of both. In-lens systems shine on telephotos because they can be tuned to the focal length. In-body systems excel with primes and short zooms and can stabilize adapted manual lenses when you set the focal length in the menu. The combined systems on many mirrorless cameras deliver excellent results for static subjects at surprisingly low shutter speeds. Still, build in a safety margin for real assignments where fatigue and adrenaline affect your handholding.
Manual focus matters for macro, astrophotography, and video pulls. Look for sufficient focus throw, a consistent linear response, and smooth damping. If you plan to pull focus in video, check for focus breathing so that framing does not change visibly during the pull. Some lenses offer a clutch mechanism to switch between auto and manual quickly, and some video-oriented designs provide de-clicked apertures for smooth exposure changes mid-shot.
Finally, be aware of minimum focus distance and magnification. A 70–200mm that focuses closely can double as a near-macro tool for details at events. A 35mm with a short minimum distance can create dramatic foreground emphasis in environmental portraits. Small spec differences in focus distance often translate into big differences in real-world flexibility.
Mounts, adapters, and compatibility: mixing brands without surprises
The mirrorless era accelerated mount development and third-party support. Native lenses usually integrate best with your camera’s autofocus and stabilization features. Adapting brings a world of older DSLR glass and can stretch a budget, but behavior varies. Smart adapters pass electronic signals for aperture and sometimes stabilization, whereas simple mechanical adapters are for fully manual lenses. Vintage primes are fun and can create distinctive rendering; just remember that manual focus at wide apertures has a learning curve.
Before building an adapter-based kit, verify:
- Autofocus reliability and speed for your subjects. Test continuous AF, eye detection, and low-light focus in your typical scenes.
- Stabilization cooperation. Some camera-lens-adapter combinations coordinate beautifully; others do not. Try your longest focal length in marginal light to learn the limits.
- EXIF pass-through. Correct metadata helps cataloging and lens profile application in your editor.
- Firmware cadence. Adapters and lenses both receive updates. Check whether manufacturers provide regular firmware that improves compatibility with new camera bodies.
Flange distance matters. Mirrorless mounts have shorter flange distances than most DSLRs, which is why many DSLR lenses adapt well to mirrorless bodies. The reverse is rarely possible. Speed booster adapters add optics that compress the image circle from a lens designed for a larger format onto a smaller sensor, effectively giving you a wider, brighter view. They can be excellent for specific setups, but evaluate corner performance and autofocus behavior in person before committing.
Finally, think about system roadmaps. If you expect to move between two mounts regularly, favor cross-platform accessories like filters and tripod plates, and keep resale value in mind. Mounts with healthy third-party support offer more price points and creative options.
Special-purpose glass: macro, ultra-wide, telephoto, tilt-shift, and cine
Specialty lenses add capabilities you cannot fake later. Each of the categories below opens creative doors, and each benefits from a short hands-on audition before purchase.
- Macro (true 1:1 reproduction). Essential for tiny subjects, textures, and product details. Consider working distance, stabilization, and focus limiters for faster hunting. A ring flash or small LED panel can simplify lighting when you are inches from the subject.
- Ultra-wide (roughly 10–18mm equivalents). Architecture and sweeping landscapes benefit from rectilinear rendering that keeps straight lines straight. Inspect corners at f/5.6 to f/8 for your style and decide whether you want creative distortion or natural geometry.
- Telephoto (300mm+). Birds and field sports demand reach and responsive autofocus. Think about balance and support as much as sharpness. A tripod collar and a monopod can make long sessions more comfortable and keep framing steady.
- Tilt-shift. Perspective control for architecture and product work, plus the ability to change the plane of focus for creative effects. These are manual, niche tools, yet unmatched when you need their control.
- Cine-style. Geared control rings, minimal focus breathing, and consistent color across a set are helpful for video projects. If you film frequently, cine features reduce friction on set and can justify the extra weight.
Teleconverters (1.4× and 2×) are another lever. They increase effective focal length at the cost of light (one or two stops) and some hit to autofocus speed. On modern high-ISO bodies, the trade-off can be worthwhile for wildlife and airshows, especially when hiking with a lighter base lens.
If you create nightscapes or shoot the Milky Way, ultra-wides with good coma control and fast apertures (f/1.8–f/2.8) simplify your life. For product photographers, a tilt-shift can replace hours of retouching by aligning the plane of focus to a tabletop. And for food and detail work, a 90–105mm macro with stabilization is a reliable workhorse that doubles as a crisp portrait lens.
Smart budgets: new vs used, rentals, and third-party value
Lens purchases feel better when they match your shooting rhythm and cash flow. A few practical budget patterns have worked for many photographers.
- Buy new for critical tools. If a lens will earn money this month or must integrate with cutting-edge autofocus modes, new units deliver the latest coatings, weather sealing, and firmware with manufacturer support.
- Buy used to unlock value. Inspect carefully for haze, fungus, and scratches. Test autofocus, stabilization, and aperture actuation. Decentering can reveal itself if one corner looks soft while the opposite looks crisp on a flat subject.
- Choose refurbished when available. Factory-refreshed units often cost less than new and usually include a short warranty.
- Rent before leap purchases. Spending a small rental fee to validate handling, autofocus, and weight can save serious money and regret.
- Consider third-party brands. Many deliver excellent optics and reliable autofocus at lower prices. Read independent field tests for your mount and verify compatibility notes.
Ownership strategies:
- Build a core kit of two dependable lenses you use weekly, then rent for outliers.
- Favor lenses over bodies for long-term value. Camera bodies evolve quickly, but good lenses serve for years across multiple generations.
- Create a rolling upgrade fund. If a lens sits unused for six months, sell it to finance gear you will actually carry.
Consider total cost of ownership. Filters, hoods, tripod collars, teleconverters, and protective cases all add up. If a lens requires an uncommon filter size, budget for at least a circular polarizer and an ND for your video or landscape needs. A step-up ring set can help standardize on one large filter size across multiple lenses.
How to test a lens before you buy: a practical field protocol
Paper specs and brick-wall images only tell part of the story. Take a candidate lens into the scenes you actually shoot and use the checklist below. Ten to twenty minutes per lens is enough to learn what matters.
- Fit and balance. Hold the lens for five minutes. Swing it from low to high and from horizontal to vertical. Can you imagine carrying it for an afternoon? Does your wrist complain?
- Autofocus character. Shoot an eye-detect portrait wide open, track a cyclist or a pet, and try a low-contrast wall. Evaluate acquisition speed, accuracy, and consistency.
- Sharpness and field consistency. Photograph detailed textures across the frame at your typical apertures. For zooms, test corners at the wide and long ends.
- Rendering and bokeh. Capture backlit foliage, point lights, and specular highlights. Look for onion-rings in highlights, busy edges, and color fringing in blur transitions.
- Flare and contrast. Place the sun just outside and then just inside the frame. Decide whether the flare signature adds character or harms clarity for your style.
- Focus breathing. For video or close-up work, rack focus from near to far and watch for framing changes.
- Stabilization behavior. Handhold at progressively slower shutter speeds at your most used focal lengths and note your personal limit.
- Minimum focus tests. Get as close as the lens allows and see whether magnification and sharpness meet your needs for details or small products.
Bring a friend or a stand-in toy for reliable focusing tests, and review images on a laptop at 100 percent rather than relying only on a rear screen. Take simple notes. Your goal is not perfection; it is predictable behavior that serves the pictures you make most often. If two lenses both look good, pick the one that makes you want to shoot more—that gut-level response often predicts long-term satisfaction.
Care, storage, firmware, and long-term upkeep
Lenses are long-horizon tools. A little routine care keeps them reliable and preserves resale value. Build a small ritual around storage and cleaning, and you will avoid most surprises.
- Daily handling. Keep front and rear caps on during travel. Use a hood outdoors for both shading and physical protection. In rain or dust, carry a microfiber cloth in a pocket.
- Cleaning workflow. Use a blower first, then a soft brush, then a clean microfiber cloth with a drop of lens solution only if needed. Wipe from center outward in circles. Avoid frequent cleaning to reduce wear on coatings.
- Storage. A sealed case with desiccant or a dry cabinet lowers exposure to humidity. Do not leave lenses in a hot car for extended periods.
- Mount checks. Inspect the mount, screws, and gaskets occasionally. A quick glance can spot a loosening screw or a compromised sealing ring before it becomes a problem.
- Firmware. Many modern lenses accept firmware updates through the camera or a USB dock. Updates can improve autofocus behavior or compatibility. Check a few times per year.
For travel, create a short checklist on your phone: caps on, hood attached in reverse, small blower, microfiber, and two spare desiccant packets. Habits reduce the chance of a last-minute scramble in a hotel lobby.
Consider accessories that meaningfully extend lens life and usability: a set of high-quality step-up rings to unify filter sizes, a slim circular polarizer to manage reflections and deepen skies, and a variable ND for video to maintain preferred shutter speeds outdoors. If your lenses share a common 77mm or 82mm filter size via step-up rings, you can carry one premium polarizer and ND instead of multiples.
Recommended kits by genre and simple upgrade paths
Use these kits as starting points and adapt to your mount, sensor size, and budget. Focal lengths below are full-frame equivalents; convert for your camera.
- Portraits and people. Start with an 85mm f/1.8 for classic head-and-shoulders work. Add a 35mm f/1.8 for environmental portraits and a 50mm f/1.4 if you enjoy low-light sessions. Upgrade path: if you begin using studio lights and bigger sets, a 70–200mm f/2.8 becomes a dependable anchor.
- Travel and street. A 24–70mm f/2.8 covers almost everything. If weight matters more, a 24–70mm f/4 paired with a small 35mm or 40mm prime is a popular combo. Upgrade path: add a compact ultra-wide like 16–28mm for tight interiors and dramatic cityscapes.
- Landscapes. Build around a 16–35mm f/4 for sharp edges and manageable weight. Add a 50mm f/1.8 for twilight details and a light 70–200mm f/4 for mountainscapes. Upgrade path: consider a sharp, weather-sealed 14–24mm f/2.8 if you shoot stars or want clean corners.
- Wildlife and birds. A 100–400mm f/5–6.3 or 150–600mm is the workhorse. Pair with a fast 35mm or 50mm prime for campsite life. Upgrade path: explore a lightweight 500mm or 600mm prime if you frequently hike long distances and can justify the cost and carry.
- Events and weddings. The classic pair is 24–70mm f/2.8 plus 70–200mm f/2.8. If weight or cost is a concern, the f/4 versions are capable with modern high-ISO sensors. Upgrade path: add a 35mm f/1.4 for dance floors and low light without flash.
- Macro and product. Start with a 90–105mm macro lens. Add a small LED light or ring flash. Upgrade path: a sturdy focus rail and a short telephoto macro for more working distance with jumpy subjects.
Simple method to avoid gear churn: pick two lenses that serve 80 percent of your work. Commit to six months with just those lenses, then review your images. Buy your next lens only if the same limitation appears again and again in your favorite photos.
If you want to go deeper on bodies, lenses, and accessories, browse our Photography Equipment hub at ephoto-life.com for practical walkthroughs tailored to real-world use.
Buying lenses is less about perfection and more about consistency. Pick tools that support your vision, test them in the field, keep notes, and refine your kit over time. A small, coherent lens set that you understand deeply will serve your photography far better than a large collection you barely use.