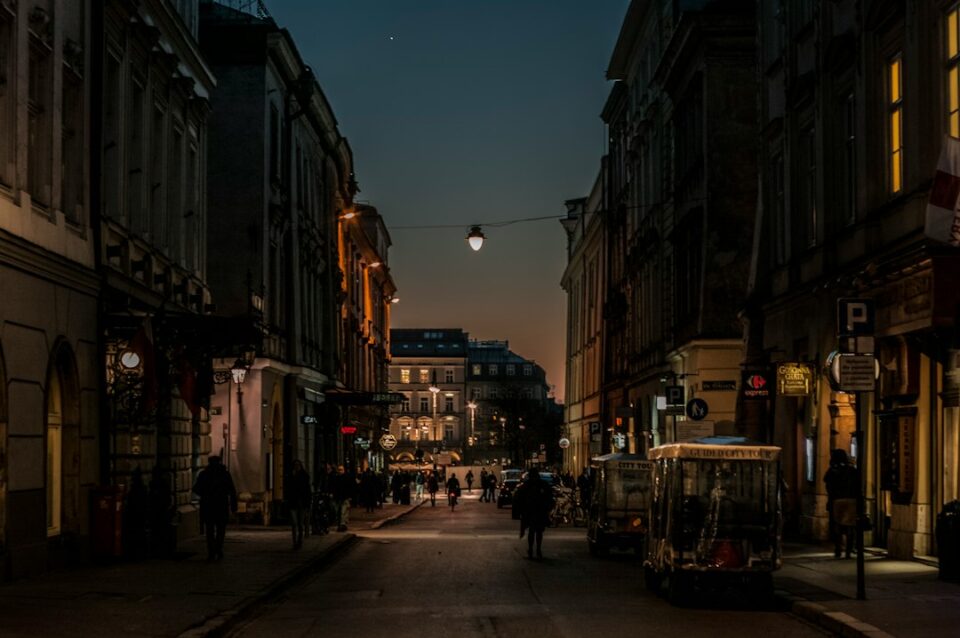
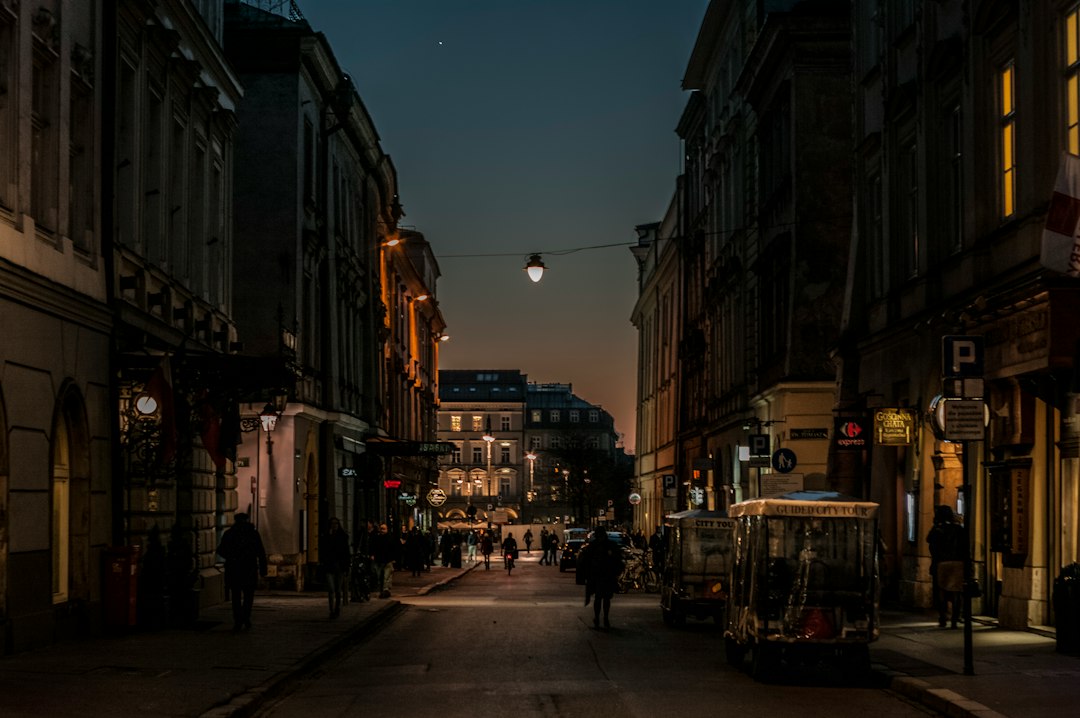
If you love the city after dark and want your photos to feel as alive as the streets themselves, low light street photography is one of the most rewarding ways to explore it. It asks you to read light like a language, to move with people and traffic, and to make technical choices that let the scene breathe instead of suffocating it. The mix of practical craft and human observation is why so many photographers keep going back out at night—because on the same block, ten minutes apart, you can make ten wildly different frames.
What “low light” really means on the street
Low light is not just “dark.” On a downtown corner at 9 p.m., you might see high-contrast pockets of brightness (storefronts, LEDs, car headlights), dim ambient spill from sodium lamps, and deep shadows swallowing details between them. Exposure decisions get tricky because the dynamic range across your frame can be enormous. A subject stepping half a meter into or out of a light cone can change your meter reading by a stop or more, and that swing compounds when you mix color temperatures from different sources—tungsten warmth on a face and blue LEDs in the background, for instance.
On the histogram, low light often looks like a “left-heavy” distribution with spikes at the extremes. The temptation is to raise ISO until everything looks bright on the LCD. But brightness on the preview is not exposure in the raw file. The question is whether you recorded enough signal where it matters without clipping highlight detail that gives a night scene its glow. Most of the time, that means being thoughtful about what should be bright, what can go to black, and how much motion you’re willing to show.
Light in these conditions is also directional and unpredictable. Headlights sweep, signs flicker, doors open and close. If you embrace that instability, you can treat the city as a studio where the lights move for you. That mindset eases the pressure to “fix” low light and instead invites you to orchestrate it.
low light street photography: core camera settings
Everything at night starts with the exposure triangle, but the priorities shift from daytime. The standard advice “lowest ISO you can” is not useful if it forces shutter speeds that erase the moment or apertures that rob you of the look you want. A better approach is to pick the aesthetic and motion you want first, then let ISO rise as the supporting actor rather than the villain.
Consider this baseline for walking downtown streets:
- Shutter speed: 1/160 to 1/250 s if you want to freeze a walking pace without frequent blur. For more motion feel, 1/60 to 1/100 s can work. For deliberate blur, 1/15 to 1/30 s (with good bracing) is a sweet spot.
- Aperture: f/1.4–f/2.8 on fast primes, or the widest end of your zoom. If your scene has harsh point sources, stopping down to f/2–f/2.8 tames coma and starburst artifacts while keeping enough light.
- ISO: Let it float. Modern full-frame bodies handle ISO 6400, 12800, even 25600 with good exposure and competent noise reduction in post. On APS-C, expect to land around ISO 3200–12800 for similar results.
There are three practical modes that suit the street at night:
- Manual with Auto ISO: Set shutter and aperture based on your creative goals; cap Auto ISO at a value you know your camera handles gracefully. This gives consistent motion and depth while the camera handles the luminance swings.
- Shutter Priority with ISO cap: If you prefer to lock motion, set a minimum shutter like 1/200 s for a lively neighborhood and let aperture/ISO adjust. Watch your lens hit its wide-open limit; exposure can dip suddenly as you move.
- Aperture Priority with minimum shutter: On many cameras, you can set a minimum shutter speed and let ISO float. Pick f/2 or f/2.8 for your lens’s sweet spot and let the camera help.
Turn on your exposure preview if your EVF supports it, but don’t chase “perfect” midtones. Preserve the glow in neon and signage by keeping highlights within range. If your camera meters too hot under LED signs, try exposure compensation between −0.3 and −1.0 EV and watch the blinkies for blown areas you care about.
Focusing after dark without hunting
Fast, clean focus is the difference between an expressive frame and a near miss. Autofocus systems have improved a lot, yet low contrast and small subjects can still make them hesitate. A few habits will reduce hunting and missed focus.
- Use back-button focus and AF-C (AI-Servo). Separating focus from the shutter lets you pre-focus as people enter a light pool, then fire the instant a gesture appears.
- Pick a small, movable AF point or a tight zone. Wide-area tracking is better than ever, but at night it can grab bright signs instead of faces. When people walk through mixed light, keep control with a small point and recompose.
- Lean on eye/face detection sparingly. It can be magic under storefront lighting and frustrating under backlit neon. If it misses, switch to a single point on the high-contrast edge of a cheek, ear, or collar.
- Use pre-focus and hyperfocal for flows. If you’re stationed where people pass at a consistent distance, pre-focus at that zone. With a 24 mm at f/4 on full frame, you can keep a generous band sharp and worry less about AF.
- Manual focus with peaking for static scenes. For architectural frames or empty intersections, MF and peaking give precise control and stop AF from jumping to light sources.
Also watch how AF assist beams and bright focus LEDs draw attention. Many street photographers disable assist lights entirely and rely on technique: pre-focus, contrast edges, and timing when subjects move into better light.
Stabilization, support, and how to stay discreet
Image stabilization changes what you can attempt handheld at night. Five to eight stops of IBIS claims won’t freeze moving people, but they will keep the static parts of the frame clean when you lean into motion blur.
- Stack your advantages: IBIS plus lens IS can make 1/8–1/15 s realistic for static scenes, and 1/30–1/60 s for scenes with people when you want context blur but readable figures.
- Brace naturally: Press the camera to your brow, tuck elbows into your ribs, exhale gently as you press the shutter, and use vertical surfaces (poles, walls). A shoulder strap taut around your neck forms a makeshift “third point.”
- Use a mini tripod or clamp sparingly: A tiny two-leg support, tabletop tripod, or a clamp can open long exposures of empty streets or car trails. Just be mindful of the vibe; small, low-key gear keeps attention off you.
- Shutter discipline: Electronic first curtain reduces vibration at slower speeds; fully electronic shutters can introduce rolling artifacts under certain LEDs, so test on your local lights.
Discretion is part of the craft. Loud shutters, bright screens, and constant chimping can break the flow of a candid night. Dimming displays, using the EVF, and making one decisive exposure instead of a burst keeps you in the scene rather than beside it.
Lenses and bodies that make night work easier
The “best” lens at night is the one you can carry for hours, operate by feel, and trust wide open. There are clear advantages to fast primes, yet modern zooms with excellent stabilization are compelling too. Choose for the way you see and how you like to move.
- Fast primes (24, 28, 35, 50 mm): f/1.4–f/2 primes give you a stop or two of light and a look that matches night mood: crisp subjects, gentle falloff, bright bokeh points from signage. They are small, focus quickly, and teach you to compose with your feet.
- Quality zooms (24–70, 28–75, 24–105): If you prefer to react from a fixed position, a stabilized zoom is versatile. At f/2.8 you still get shallow separation, and at f/4 modern sensors pick up the slack. IS buys slower handhold speed for static elements.
- Sensors and bodies: Full-frame sensors offer cleaner high ISO and more highlight headroom. APS-C and Micro Four Thirds can absolutely sing at night with careful exposure and good post; the tradeoffs are noise texture and depth of field.
- Useful accessories: A soft-release button for better shutter feel, a wrist strap for quick draw, a tiny white card for quick white balance sampling, and a pocket microfiber to wipe mist and drizzle from the front element.
Weather resistance is nice, but the real win is routine. Wipe condensation before it beads, keep a spare battery warm in an inner pocket, and check your lens hood so stray rain and flare don’t wash contrast out of your frames.
Color, white balance, and mood in mixed light
Night is rarely one color. You might have the amber of sodium vapor, the mint-blue of LEDs, a splash of magenta from a sign, and the neutral of a storefront. A single white balance can’t “correct” all of that, so instead decide which color you want to anchor and let the rest create mood.
- Shoot RAW and set a consistent baseline WB. Many photographers pick 3200–4200 K at night to bias cooler, preserving neon punch and keeping skin tones from turning orange. Others set Auto WB and correct per frame. Either way, think of WB as an artistic choice, not a rule.
- Mind green/magenta shifts. Some LEDs push green; storefront fluorescents can go both directions. In post, the tint slider is often more important than Kelvin, and local adjustments on faces can restore skin without killing ambient color.
- Use color contrast deliberately. Put a warm face in front of a cool sign; place a cyan highlight against an amber wall. Complementary colors build tension and make subjects pop without extra sharpening.
- Try custom WB cards or gel tricks. For static, repeatable scenes (a portrait in a doorway, a vendor at a stall), sampling a custom WB off a neutral card gives you a clean starting point. For creative effects, a tiny handheld gel over a key light can make a subject sing.
Watch your histogram for color channel clipping as well as luminance. Night scenes often clip in one channel long before the whole signal hits the right wall. If the red channel pegs under neon, ease exposure until detail returns; you can lift midtones later.
Composition when the dark does half the drawing
Night compositions live and die by edges and shape. What disappears into black is as important as what remains. This is liberating because the frame simplifies itself: busy daytime backgrounds fall away, leaving gestures, reflections, silhouettes, and geometry to carry the story.
- Find pools of light and wait. Pick a spot where light falls cleanly on the sidewalk and watch the flow. People enter, legs scissor, a hat tilts, a hand lifts with a cigarette. Raise to your eye early, focus on the leading edge, and press when the limb separation is clean.
- Use reflections to stack depth. Puddles, bus windows, cafe glass—at night they become canvases. A wide lens close to a puddle can turn a small reflection into half the frame, placing your subject in a floating world of color.
- Silhouette with a clear outline. If you shoot back into a lit doorway or billboard, let your subject go to black but keep an unmistakable shape. Watch for profiles, hats, raised arms—shapes that read instantly.
- Guide with lines. Crosswalks, tram tracks, curb edges, shadows from railings become leading lines. Set them to guide the eye to your subject or an implied destination beyond the frame.
Because night compresses the palette, micro-composition matters. A step to the left removes a stray highlight; a crouch adds a stronger reflection. Slow down enough to make those moves consciously, even if the exposure itself is quick.
Motion: when to freeze, when to blur, and how to pan
Motion at night is special because the moving parts often carry the brightest light—headlights, taillights, illuminated phone screens—while the surroundings rest in darkness. Decide what kind of time you want to show inside the frame and set your shutter around that.
- Freeze: 1/200–1/500 s depending on focal length and subject speed. Freeze works when the gesture is the story: a laugh, a glance, a child leaping across a puddle.
- Intentional blur: 1/10–1/40 s to show a stream of walkers while a statue, pole, or sign stays sharp. Brace or use stabilization to keep the anchor clean; let the people paint the scene.
- Panning: 1/20–1/50 s with follow-through as a bicycle, scooter, or car passes. Pivot from your hips, start tracking early, roll smoothly, and press mid-swing. Expect a low keeper rate; the ones that hit feel like speed itself.
Shutter speed choices interact with focal length. Longer lenses magnify shake and exaggerate motion blur for the same time value. If a 50 mm yields mush at 1/20 s during a pan, a 28 mm at the same speed may give you crisp faces with streaking lights.
Safety, ethics, and the social fabric at night
Street work is built on respect. That respect includes understanding the energy of a block at night, reading people’s body language, and knowing your own boundaries. If a moment feels tense, step back, lower the camera, and let it pass. Most nights pass with smiles, nods, and indifference; occasionally one doesn’t.
- Personal safety: Keep your bag small and close, avoid flashing expensive gear, and stay aware of what’s happening behind you. Work with a friend when you’re new to a neighborhood; share locations and planned routes.
- Boundaries: Some situations call for consent; some public interactions feel fine without it. If someone notices you and looks uncomfortable, a simple hand wave and “Want me to delete that?” can diffuse friction. Many will shrug; some will appreciate being asked.
- Private property and posted rules: Transit systems, malls, and markets vary widely on photography rules. A friendly approach and a small footprint go further than debates about public rights in semi-public spaces.
- Local culture: Festivals, religious gatherings, and memorials deserve extra care. Ask a participant or an organizer where you can stand and what’s appropriate.
When you show your work, captions and context matter. Avoid demeaning frames and stereotypes; aim for pictures that grant dignity even when the scene is chaotic.
From capture to clean files: a night editing workflow
Night files come alive in post if you respect the signal you captured. The goal is a clean base that preserves highlight character and shadow separation while keeping noise under control. This is less about “fixing” and more about finishing.
- Expose to protect highlights you care about. If neon signs or headlight reflections matter to the shot, bias exposure so they aren’t clipped. In raw, you can raise midtones without the plastic look that over-sharpened shadows get.
- Noise reduction strategy: Apply global luminance NR gently and recover detail with masking and selective sharpening. Many use AI-based tools effectively; the key is restraint—retain skin texture and the bite of small details like hair and fabric weave.
- Color management: Set WB and tint for the story, not a neutral gray. Use HSL to nudge sign colors into harmony; isolate skin with a mask and bring it to believable warmth without killing the ambient hues around it.
- Local contrast: Dodge and burn like a printmaker. Lift faces and hands by a third of a stop, deepen distracting mid-gray areas into black, and draw eyes across the frame with subtle vignettes that mimic the actual light falloff.
- Grain and texture: A hint of grain at night can feel natural and hide small NR artifacts. Keep it fine and subtle so it reads as intention rather than a smokescreen.
Work non-destructively. Virtual copies let you explore both a cool, neon-driven version and a warmer, human-centric take without overwriting. When you find a look that fits a location (a specific market, a particular boulevard), save a preset so your next set starts closer to home.
Field exercises that build reliable night instincts
Skill grows fastest with focused practice you can repeat. Here are drills that translate into real-world improvements within a few nights out.
- Light pool waiting game: Pick a pool of light where people pass through. Pre-focus, set 1/200 s and f/2, let ISO float. Make 30 frames, but only press when limb separation and posture are clean. Review for timing: How many frames are a beat too early or late?
- One focal length, one block: Take a 35 mm for an hour and stay on one block. Start wide open, then stop down one stop every ten minutes and adapt composition. This trains you to see depth of field as a design choice rather than a default.
- Reflection hunt: After rain, find five different reflections within two blocks—puddles, windows, polished stone. Vary angle and height; get the lens close to the surface for drama.
- Panning practice: Stand near a bike lane, set 1/30 s, and make 50 pans. Breathe, pivot from your hips, and keep the subject in the same part of the frame. Don’t worry about background mess; you’re training smoothness.
- Mixed light portrait: Ask a friend to stand under a storefront awning. Make three versions: cool WB (3500 K), warm WB (5000 K), and Auto WB. Compare how skin looks, how ambient color reads, and which feels truer to the place.
Build a personal “night pack” and routine. Batteries charged; cards cleared; lens cleaned; strap set to the right length; camera on your preferred night mode (AF-C, Auto ISO cap, minimum shutter). That five-minute ritual lowers friction and gets you out the door more often.
Common problems and a practical troubleshooting guide
Night introduces its own set of hiccups. Treat them as signals rather than failures; each points to a small adjustment in technique or settings.
- Everything looks smeared. Your shutter is too slow for the way you’re shooting. Increase shutter speed a stop or two, widen aperture if you can, and let ISO climb. Brace better or use stabilization to keep static elements crisp as motion blurs.
- Autofocus keeps grabbing the background. Switch from wide-area to a single point or small zone and place it on a high-contrast edge of your subject. Turn off eye-detect if neon keeps confusing it.
- Skintones are sickly under LEDs. Nudge tint toward magenta and try a local WB adjustment just on faces. If the whole frame goes weird, use HSL to subdue the offending color range instead of changing WB globally.
- Highlights have ugly halos. Over-sharpening or aggressive noise reduction can create halos around bright edges. Back off sharpening, use masking so edges get crispness without the glow, and aim for good exposure in-camera to reduce heavy lifting later.
- Banding under certain signs. Electronic shutters and some LED refresh rates don’t play well. Switch to mechanical or EFCS in those spots and see if the banding vanishes.
- Files look flat compared to memory. Night contrast is tricky. Use curves to deepen blacks selectively; add local contrast on faces and key objects rather than global clarity that elevates noise.
Make a tiny checklist on your phone so you can diagnose on the street: “Too blurry—raise shutter. AF misses—smaller point. Weird color—check tint. Banding—mechanical shutter.” When the fix is a single line, it’s easier to apply.
Workflow hygiene, backups, and keeping your gear happy
Night work is a long game. Consistent habits around files and equipment make it sustainable, especially if you’re shooting several nights a week.
- Ingest with structure: Use a predictable folder convention (YYYY/MM/DD-Location) and tag with keywords like “neon,” “rain,” “crosswalk,” and the neighborhood name. You’ll thank yourself six months from now.
- Rate fast, edit slow: Do a quick two-pass cull the night you shoot while the walk is fresh in your mind, but save final edits for rested eyes. Night color decisions benefit from a pause.
- Backups: At least 3-2-1: three copies, two different media, one offsite or cloud. Portable SSD in your bag until you get home, then a desktop drive and a cloud sync when you plug in.
- Firmware and profiles: Keep camera firmware current and load lens profiles so distortion and vignetting behave as expected in post, especially with fast wide lenses.
- Lens and sensor care: City grit and drizzle build up fast. Pack a small blower and microfiber; clean the front element when you see flare that wasn’t in the scene. If you change lenses outside, shield the mount from wind and drizzle.
When a session goes sideways—gear hiccup, settings drift—write a one-line note in your phone about what happened and how you solved it. These bite-sized “lessons learned” pile up into a personal handbook better than any manual.
Building projects, not just one-off frames
Night street work can become a body of work when you give it a shape. Instead of chasing random moments, consider a small project that narrows your attention and deepens your observation.
- One corner, four weeks: Photograph the same intersection two nights a week for a month. Note how crowd patterns, light, and weather reinvent the frame. Sequence the results left-to-right like a time-lapse of human rhythm.
- Single color hunt: Spend three nights collecting frames dominated by one color—blue LEDs, orange sodium, or magenta neon. The constraint sharpens your eye for the way color drives mood.
- Micro-gestures: Focus on hands, shoes, and hats. The small things that read instantly across a dark frame can be a signature series.
- After-rain reflections: Make a zine that exists only because of puddles. Vary focal lengths and angles; mix frozen and blurred reflections.
Projects also help you share your work coherently. A short online gallery or a small printed booklet can carry a viewer through a night the way you experienced it, from the first frame at dusk to the last one under the last train’s platform lights.
Further learning and community
Photographing after dark is easier—and more enjoyable—when you share routes, meet other night shooters, and study bodies of work that expand your intuitions. Browse classic and contemporary night projects, walk with a friend to trade feedback, and revisit your favorite blocks in different weather and seasons. If you want more reading and gear notes, check the resources at ephoto-life.com and keep a running list of ideas you want to try next time you head out.
Most of all, put yourself where good light and human stories cross, then let the night guide your choices. The city will do half the drawing—with your timing and attentiveness doing the rest.