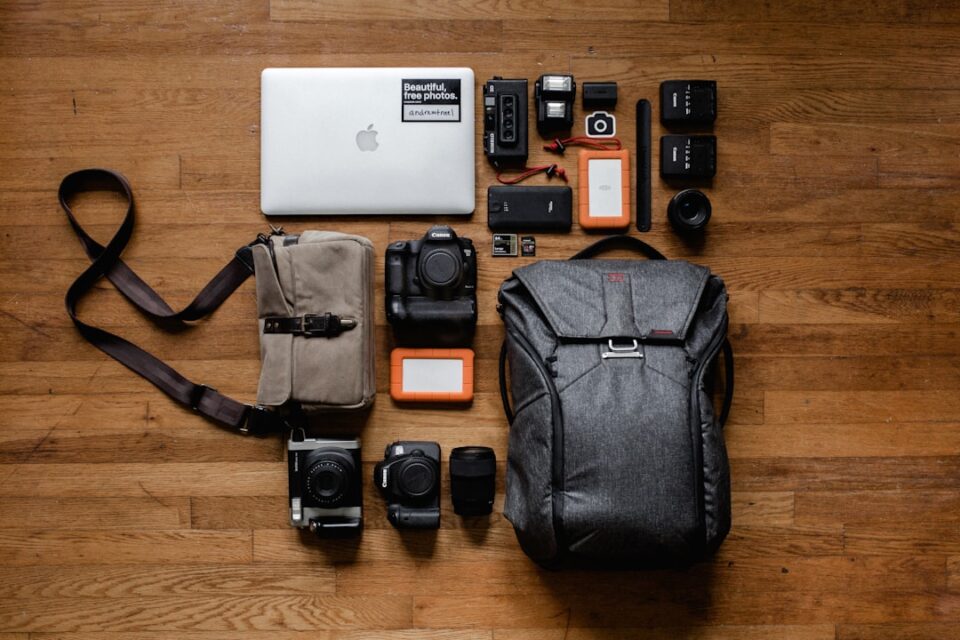
A Camera Backpack for Photographers changes the way I move through a shoot before I leave the house. It decides how fast I can pack, how calmly I can work, and whether I spend the day thinking about the photo or thinking about the bag. I used to assume every camera pack was more or less the same. After enough mornings digging for a spare battery in bad light, I stopped believing that. The bag is part of the workflow.
I keep a running gear checklist on ephoto-life.com and I use it before I buy or borrow any new pack. That habit keeps me honest. I ask the same basic questions every time. What body am I carrying most often? How many lenses do I actually use in a normal week? Do I need a laptop sleeve, a tripod holder, or room for a jacket? How far am I walking? Once I answer those, the choices become clearer and the marketing noise gets quieter.
This article is about how I think through those choices in real life. I am not looking for a perfect bag that solves every situation. I want a Camera Backpack for Photographers that fits my body, matches my gear, and stays useful when the day gets messy. The right pack disappears into the routine. The wrong one keeps asking for attention.
Camera Backpack for Photographers: What I Want the Bag to Do
The first thing I look for is not capacity. It is behavior. A camera backpack should carry fragile gear with enough structure that I do not feel nervous every time I set it down, but it should also stay easy to live with when I am moving fast. I want the bag to support the work, not become another small project inside the day.
That sounds obvious, but I still see people shop by silhouette or color first. I get the appeal. A clean bag looks good in a product photo. But the picture on the product page does not tell me whether the zipper opens in a useful direction or whether the harness starts to pinch after an hour. I care about the boring details because the boring details are what I feel at 7 a.m. on a long walk.
My own priorities usually come in this order. First, protection and stability. Second, comfort. Third, access. Fourth, organization. If a bag gets those four things right, I can work around almost anything else. If it gets one of them badly wrong, I end up adjusting my plan around the backpack instead of the shoot.
- It should hold my main body and lenses without forcing awkward stacking.
- It should let me reach the most-used item quickly.
- It should stay comfortable when the load is full.
- It should feel predictable when I close, carry, or set it down.
That list sounds simple, but it filters out a lot of shiny options. When I compare bags using those four questions, the answer is usually more honest than any spec sheet. A pack that looks premium but fights my hands is not a good fit. A plain pack that works every time usually wins.
Start With the Kit I Carry Most Often
I never start by imagining the biggest setup I might own someday. I start with the kit I use most often. That is the only setup that deserves to shape the bag. If I plan for a future collection that does not exist yet, I end up carrying extra volume, extra weight, and extra dead space for no reason.
For me, that usually means one body, two or three lenses, a few batteries, a charger, cards, a cleaning cloth, and sometimes a compact tripod. Someone else might need two bodies, a flash, a drone, a laptop, and a rain shell. The bag should match the pattern of use, not some ideal version of it. I learned this the hard way after buying a pack that was impressive in the store and annoying on every actual outing.
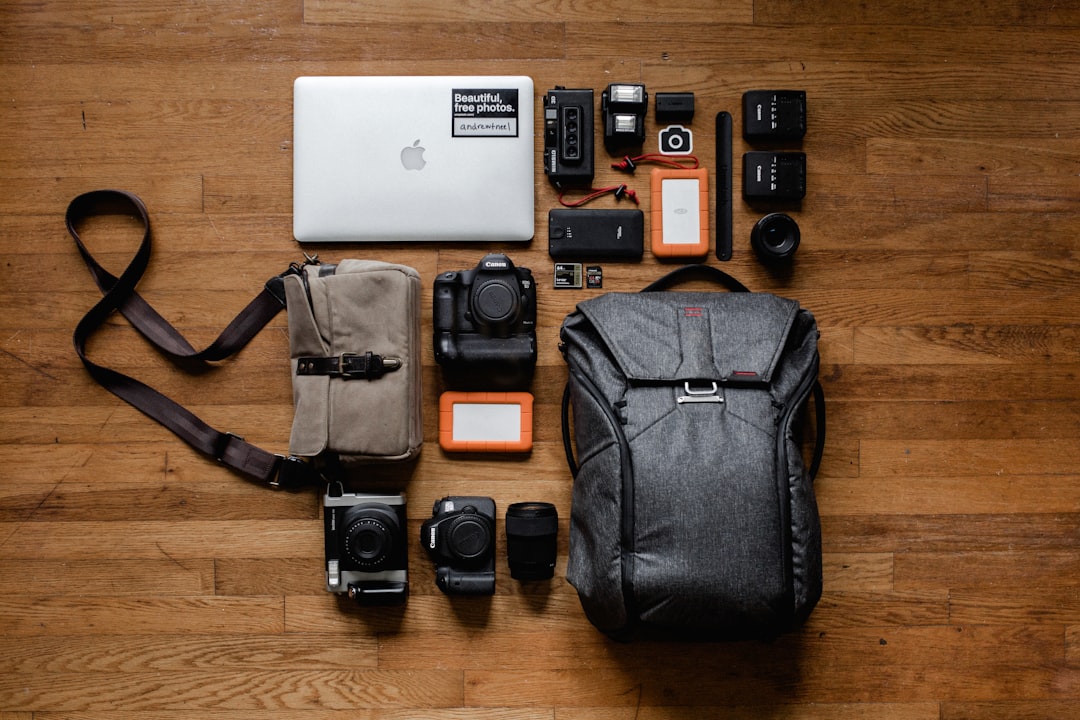
I like to lay the gear out on a table before I compare bags. Then I pack it the way I would use it on a normal day. That small step shows me where the real bulk sits. Some lenses are short but wide. Some bodies are slim until you add a grip. Some laptop sleeves steal more room than the numbers suggest. Once I see the load as a pile instead of a list, the right size becomes easier to judge.
There is another reason I start here. My work is not the same every week. Some weeks I shoot portraits and swap lenses often. Other weeks I walk city streets and only need one body and one lens. A Camera Backpack for Photographers should support that range without making me reorganize the whole day. I do not want a pack that only works when I am in my most prepared mood.
If I can pack the bag in a normal way and still close it without force, that is a good sign. If I have to compress the contents every time, the bag is too small for my real use. If I can toss in extra items without any structure, the bag may be too large. I want the middle ground where the gear has a home and the backpack still feels intentional.
Size, Shape, and the Hidden Cost of Extra Space
It is tempting to think bigger is safer. I thought that way for years. More room feels like more flexibility, and more flexibility sounds like a good thing. The problem is that extra space often becomes extra weight, and extra weight becomes slower movement. It also makes organization worse because small items drift around inside a larger cavity.
I pay attention to three size questions. How tall is the bag? How deep is it? How much of that volume is actually useful once the dividers are in place? Two bags can look similar from the outside and feel completely different once they are loaded. One may keep the camera zone compact and usable. The other may waste half its internal volume in corners that do not fit anything well.
Shape matters almost as much as volume. A tall, narrow pack can feel stable on the back but awkward when I need to dig for a lens. A wider pack may be easier to organize but more likely to bump a seat, a rail, or a car door. I think about where the bag will live during the day. Under a seat? On a train? In a trunk? At the edge of a crowded sidewalk? The answer changes the shape that feels best.
For travel, I also check whether the pack fits the way I actually move through terminals and stations. Some packs look airline friendly until I try to slide them under a seat and discover the sides are too stiff or the top is too tall. A bag that is a little smaller than ideal can be far easier to live with than one that is technically larger but practically clumsy.
I have also learned that empty structure can be misleading. A bag that stands up nicely in a shop may feel very different once I add a body, two zooms, batteries, a charger, and a laptop. The shell may still hold its shape, but the shoulder load changes. If the pack is too deep, weight can drift away from my back. If it is too high, it can feel top heavy. That is why I care about the shape of the load, not just the amount of room.
When I compare sizes, I try to imagine an ordinary day, not a fantasy day. How does the bag feel when I am tired and late? How does it feel when I am standing in line? How does it feel when I need to set it on a wet curb? Those moments tell me more than the product gallery does.
Access Design Matters More Than People Think
Access is where many bags separate themselves in real life. A backpack can have great padding and still annoy me if I have to open it like a puzzle box. I do not want to unpack half my kit just to reach one lens. I want the access pattern to match the kind of shooting I actually do.
Rear access keeps the gear zone against my back. I like that for city work and crowded places because it makes casual access harder and keeps the main compartment cleaner when I set the bag down. Side access is faster when I know I only need one item and I do not want to take the bag off completely. Full clamshell access is useful at home or in a hotel room when I am repacking everything from scratch.
There is no single winner. The better question is what kind of interruption I want to avoid. If I am doing street or travel work, I often value security and discretion. If I am shooting portraits or events, I value speed. If I am on a road trip or a flight, I value the ability to see everything at once. Good design respects the context.
I also care about how the bag behaves when it opens. Some zippers glide in a way that feels natural. Others stick, catch, or stop at awkward points. Some flaps hold their shape when I open them. Others fold in the wrong direction and make it harder to retrieve gear. These little things add up when the light is changing or the client is waiting.
The best access system is the one I stop thinking about after a few uses. That is my real test. If I still need to remember which zipper goes where after several shoots, the layout is not intuitive enough. The bag should teach me quickly and then get out of the way.
Here is a simple comparison I use:
- Rear access for discretion, cleaner contact with the world, and better use in crowded spaces.
- Side access for fast lens swaps while standing.
- Clamshell access for full visibility and easy repacking.
Most photographers do not need all three to be perfect. They need one of them to fit the way they move most often. That is the difference between a bag that looks smart and a bag that works smart.

Comfort Is a Workflow Feature, Not a Luxury
I used to think comfort was a soft preference. It is not. When a bag pulls on one shoulder, cuts into my chest, or rides too high on my back, the effect shows up in the shoot. I move more slowly. I adjust more often. I get tired earlier. A comfortable bag is not a nice extra. It is part of the day working well.
Straps matter first. I look for straps that curve naturally and distribute pressure across a wider area. Thin straps can feel fine for ten minutes and then become irritating when I walk farther than expected. Padding should feel dense enough to support weight without turning the strap into a stiff plank. I also check whether the shoulder straps sit close to my neck or too far toward the edge of my shoulders. That detail changes how the whole bag feels.
A sternum strap helps when the bag is full or when I am moving quickly through a station or a crowded street. It keeps the load from drifting outward and reduces that side-to-side bounce that can make a pack feel clumsy. A hip belt helps more when the load gets heavier, especially on longer walks. I do not need every pack to be a mountaineering rig, but I do want the option to shift some weight away from my shoulders.
The back panel matters too. A flat panel can be fine for short distances. A shaped or ventilated panel tends to feel better when I am walking longer or working in warmer weather. I do not expect a camera backpack to feel airy in every condition. I do expect it to avoid turning my back into a heat trap by the middle of the afternoon.
Fit is personal, so I pay attention to how the bag sits on my torso rather than how it looks on the shelf. If it feels too tall, the bottom can hit my lower back when I lean. If it feels too short, the load may sit awkwardly high. If the shoulder straps are too wide, my arms start to notice. I prefer a close, balanced fit that feels like part of my body instead of a box hanging off it.
When I can, I test the pack loaded. I walk around the store, bend slightly, and notice where the pressure lands. If I can feel the bag in a bad way after a few minutes, I do not convince myself it will get better later. It usually gets worse.
- Curved straps spread pressure better than straight ones.
- A sternum strap helps stabilize a full load.
- A hip belt helps when weight increases.
- A shaped back panel usually feels better over long walks.
Padding, Shell Fabric, and Weather Readiness
I do not expect a backpack to make gear invincible. I do expect it to reduce the everyday knocks and bumps that happen when I am moving through a city, a car, a terminal, or a rough path. Good padding keeps items separated and stable. Good shell fabric helps the bag keep its shape and deal with normal wear. Good weather readiness gives me more calm when the sky changes.
Padding should be dense enough to keep a camera body from rattling and lens barrels from grinding against each other, but not so thick that it steals all the interior space. I want structure where the gear needs it and flexibility where the bag can afford it. Dividers that are easy to move but still stay put are especially useful. If the padding is soft but floppy, I lose a lot of useful organization.
The shell fabric should feel like it can handle being set on a curb, a sidewalk, or a dusty floor without immediately looking tired. I also look at the zipper coverage. Covered zippers and protected seams are useful because they reduce the amount of direct exposure from light rain and splashes. I still plan for the weather, but I like a bag that handles ordinary conditions with less drama.
For outdoor work, I care about the bottom panel as much as the main body. That is the part most likely to touch wet ground or rough surfaces. A reinforced base gives me a little more confidence when I have to set the backpack down quickly. A rain cover can be useful, but I do not want the whole bag to rely on it as the only line of defense.
I also pay attention to the small details that become annoying in real use. Are the zipper pulls easy to grab? Does the fabric shed dust easily? Does the bag dry fast if it gets damp? These things are not exciting, but they tell me whether the pack will age gracefully or become a problem after a few busy months.
If I know I will be out in mixed conditions, I look for a weather-ready camera backpack that balances protection and ease of use. Too much armor can make the bag stiff and heavy. Too little structure can leave the gear wandering around inside. The middle ground is where the useful bags usually live.
Organization That Saves Time in the Field
Internal organization is where a backpack starts to feel personal. I like to know exactly where things live. Body here. Primary lens there. Batteries in one pocket. Cards in another. Cleaning cloth in a spot I can reach without digging. That arrangement sounds tiny, but it saves time every single day.
When a bag has too many pockets without a clear plan, I spend extra mental energy remembering where I put things. That gets old quickly. I prefer a layout that makes the right choice obvious. If a pocket is meant for cards, it should be small and obvious. If a pocket is meant for cables or a charger, it should be deep enough to hold them without turning into a black hole.
I also think in layers. The camera zone should be structured. The outer space can be looser. A laptop sleeve, a jacket compartment, or an accessory pocket is useful as long as it does not invade the main gear space. If the general storage starts competing with the padded section, the bag becomes harder to trust.

My favorite layouts are the ones that let me pack the same way every time. Repetition matters. If I always place my body on the same side and keep the spare battery in the same pocket, I can repack quickly at the end of the day. I also know immediately if something is missing before I leave the location.
There is a cost to cleverness here. Some bags try to be too smart with hidden slots, detachable inserts, or unusual panel arrangements. Those features can be useful, but only if they fit the way I think. If I have to relearn the bag every week, the design is costing me attention. I prefer systems that make sense under pressure, not only on a clean table at home.
- Give every small item one fixed place.
- Keep cards and batteries in pockets that are easy to check.
- Separate camera gear from loose daily items.
- Use dividers that stay in place after a walk.
- Pack the same way each time so repacking becomes automatic.
Travel, Commutes, and Airport Reality
Once I leave the local shoot and start traveling, the bag has to do a second job. It has to fit into trains, cars, overhead bins, under seats, and crowded walkways without becoming a burden. A pack that works beautifully in a studio can feel awkward the moment I add a boarding pass or a subway ride.
For travel, I care about a few things more than I do at home. First, discreet shape. I prefer a bag that does not shout camera gear from across the room. Second, easy lifting. A side handle or a top grab point helps when I need to slide the bag into a car trunk or lift it to a shelf. Third, clean structure. If the backpack collapses into an odd shape when half full, travel gets frustrating.
I also think about access in transit. Rear access is useful because it keeps the main gear section closer to my body and less exposed while I move through crowds. Small exterior pockets help too, especially for cards, a notebook, snacks, or cables. I do not want to open the main compartment every time I need one small item.
Air travel adds another layer. A bag that seems compact in a store can still feel bulky under a seat if the side pockets are too deep or the shell is too rigid. I try to look at real dimensions, not just capacity numbers. If a bag fits well on paper but not in the cabin, the paper dimensions do not help me much.
Commutes matter just as much for many photographers. If I am on buses, trains, or city sidewalks, the backpack needs to stay close to my body and move well when I turn. I do not want it to swing around every time I change direction. I also want enough structure that I can set it down in a café or station without worrying about the interior collapsing.
Travel and commuting reward restraint. I usually find that a medium-size bag with thoughtful access works better than a giant pack that promises room for everything. The smaller, better-shaped bag often feels calmer and easier to trust.
Comparing Backpack Types for Different Jobs
Not every photographer needs the same kind of backpack. The right choice changes with the job. I think in terms of use case before I think in terms of brand. A travel shooter does not need the same layout as a studio assistant. A portrait photographer does not need the same packing rhythm as a landscape shooter. That sounds obvious, but it saves a lot of money when I actually follow it.
For travel photography, I want a compact pack with discreet styling, fast access, and enough space for one body, a couple of lenses, batteries, and a small tripod. For that job, I value portability over bulk. For landscape work, I care more about comfort, weather readiness, and the ability to carry extra layers or filters. For events or portraits, I want quick swaps and easy sorting because I am likely to reach for batteries and lenses often.
Video work changes the equation again. Audio gear, lights, cages, batteries, and small accessories tend to be awkward shapes. I look for flexible dividers and a little extra room for things that do not pack neatly. If I am carrying a mixed stills and video kit, I need a backpack that handles both types of gear without turning into a mess.
Here is the way I compare common backpack styles:
- Travel camera bag — best when I need compact shape, discreet looks, and easy movement through airports or stations.
- Photography gear backpack — best when I carry a larger kit and want more divider control.
- Camera bag organization focused pack — best when I care most about small items, cards, and battery placement.
- Weather-resistant camera backpack — best when I work outside and want more confidence in changing conditions.
The important thing is not the label. It is whether the layout matches the kind of work I actually do. I would rather have the right backpack for one type of day than a compromised backpack for every possible day. A precise fit usually beats a generic promise.
Care, Cleaning, and Long-Term Use
A good camera backpack should last long enough that I get used to it. That takes care. I do not baby my bags, but I do try not to abuse them. I brush off dust, empty crumbs and cable scraps, and let the bag dry fully if it gets damp. Small habits like that make a noticeable difference over time.
I also check the stress points every few weeks. Straps, zipper pulls, seam corners, and the bottom panel are the places most likely to show wear first. If I catch a loose thread or a worn edge early, I can keep the pack useful longer. That is not about obsession. It is about avoiding a sudden failure in the middle of a shoot or trip.
Cleaning should be simple. If a bag needs special handling every time it gets dusty, I will probably avoid using it as much as I should. I prefer packs that can handle a gentle wipe-down and an air dry. Removable dividers help too because they make it easier to shake out the interior and keep the layout from becoming stale or dirty.
Long-term use also depends on whether the backpack still fits my habits after the novelty wears off. That is the test most bags fail quietly. They look great for the first month and then become mildly annoying. I try to notice whether I still reach for the right pockets automatically and whether the straps still feel natural after real use. If the answer is yes, the bag is earning its place.
I like to think of maintenance as part of the purchase, not an extra chore. A backpack that stays clean, opens smoothly, and keeps its shape is easier to trust. A pack that starts to sag, stain, or snag too early becomes a distraction. Small care routines keep the workflow steady.
A Practical Checklist Before You Buy
When I am close to making a choice, I run through one last checklist. It keeps me from getting distracted by a feature I do not really need. If the bag passes these questions, I am usually comfortable moving ahead.
- Does the bag fit my most common camera kit without forcing the zipper?
- Can I reach the main item without unpacking the whole interior?
- Does the harness feel balanced when the bag is full?
- Does the shape work for my commute, my car, or my usual travel route?
- Are the divider slots flexible enough for the gear I actually carry?
- Is the shell sturdy enough for daily knocks and light weather exposure?
- Do the small pockets make sense at a glance?
- Can I repack it quickly at the end of a long day?
If I can answer yes to most of those, I know I am close to a good fit. I also try to picture one ordinary, slightly messy day. Not the clean studio day. The day when I am late, carrying a coffee, maybe switching locations, maybe packing in a rush. If the bag still feels manageable in that scenario, it is probably worth trusting.
The best Camera Backpack for Photographers is the one that lets me focus on the shoot instead of the storage. I want the bag to feel like a reliable part of the kit, not another decision hanging over the day. When the pack fits the work, I stop thinking about it. That is usually how I know I chose well.